Updated: March 5, 2023.
Learn how to audit an XML sitemap in 5 easy steps.
In this article, I’m going to show you how to audit an XML sitemap as part of doing an SEO audit to make sure the XML sitemap contains all the right URLs.
An XML sitemap is basically a roadmap that helps search engines crawl and index all the important pages on a website. But when does it really matter? And when can you skip it?
I’ll go over that too, and help you determine when you should put the sitemap at the top of your priority list.
So, let’s dive into how to audit an XML sitemap like a pro!

How to audit an XML sitemap: the gist
If you don’t want to read the entire article, here is the gist about auditing XML sitemaps:
- XML sitemaps are important only for huge websites. Small sites can do without having an XML sitemap.
- Always check the Sitemaps report in Google Search Console (Indexing > Sitemaps) when auditing a site.
- Crawl XML sitemaps with a crawler like JetOctopus, Screaming Frog, or Sitebulb to quickly see if XML sitemaps contain the URLs they should not contain.
- XML sitemaps should only contain canonical and indexable URLs that return status code 200 (OK).
- Incorrect URLs in the XML sitemap of a large website can negatively impact the crawl budget of the site.
How to audit an XML sitemap: the detail
And here is a more detailed version of how to audit an XML sitemap as part of an SEO audit process.
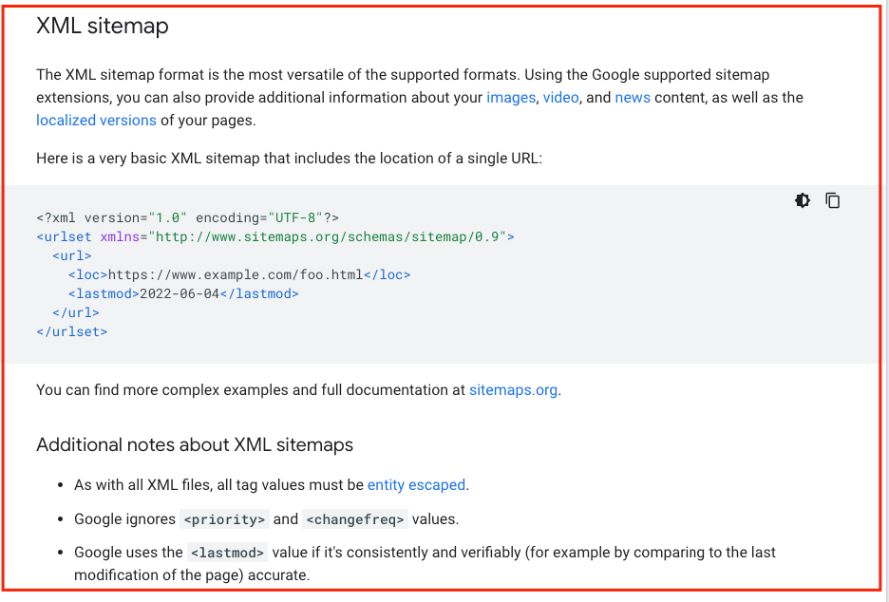
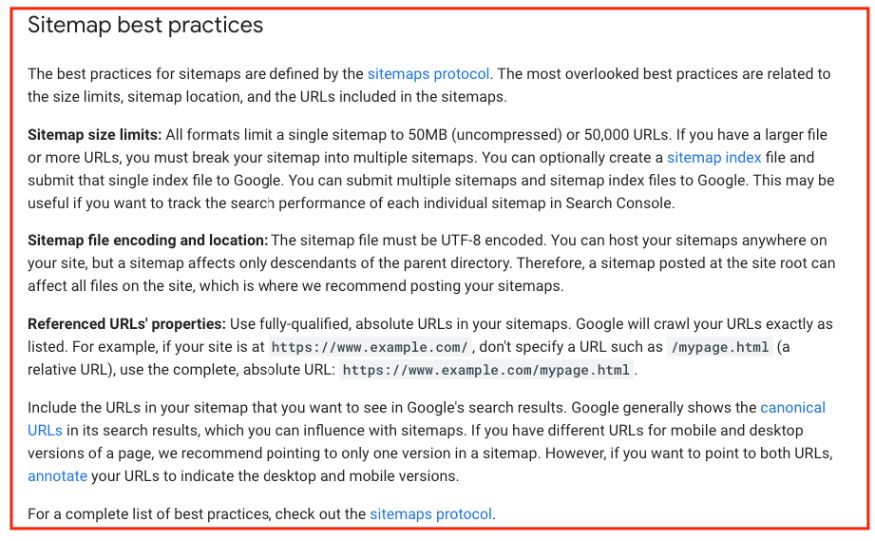
Keep in mind that this is not the full guide to XML sitemaps with all the information and possible use cases. If you are interested in a deep dive into XML sitemaps, read the Google documentation on sitemaps.
What URLs the XML sitemap should contain
The URLs an XML sitemap should contain are those that are important for search engines to crawl and index.
This includes pages that you want to rank for in search engine results pages (SERPs), as well as pages that are difficult for search engines to find, such as pages with dynamic content or pages that are not linked from other pages on your website.
Don’t include pages, such as pages with duplicate content, pagination pages, pages that are under construction, redirected pages, canonicalized pages, or basically any pages that are not canonical versions of a given URL.
Step 1: Assess if an XML sitemap is a priority for the website
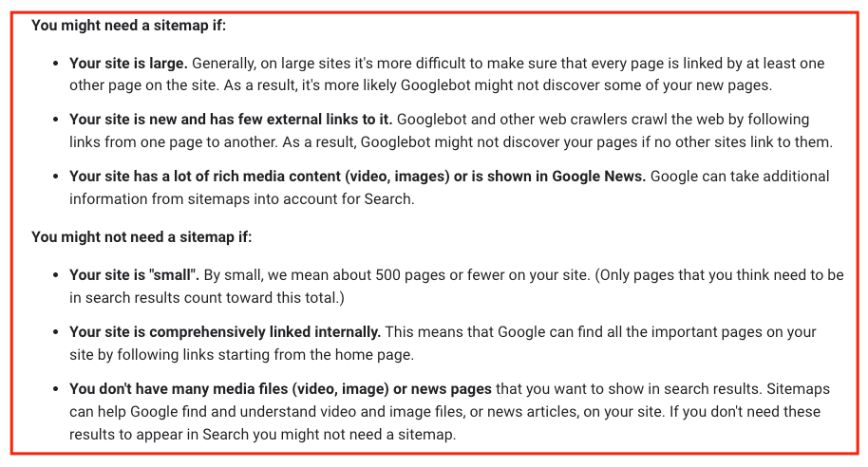
A sitemap may be necessary if you have a large website, a new website with few external links, or a website with a lot of rich media content or is shown in Google News.
On the other hand, a sitemap may not be necessary for a small website with less than 500 pages, a comprehensively linked internal site, or a site with few media files or news ages that you want to appear in search results.
The purpose of a sitemap is to help Google understand the structure and content of your website and to make sure that all important pages are crawled and indexed.
I think Google – the source – does an excellent job explaining when an XML sitemap may and may not be a priority.
Step 2: Find the XML sitemap of the website
If you’re looking for a website’s XML sitemap, the quickest and easiest way to find it is to manually check common locations:
- The most common locations for sitemaps are /sitemap.xml, /sitemap_index.xml (which is the index of the sitemaps), and /sitemap/ (which often redirects to sitemap.xml).
- Other possible filenames for the sitemap or the sitemap index include /sitemap.php, /sitemap.txt, and /sitemap.xml.gz (using gzip compression).
- Another way to find the sitemap is to check if it is indicated in robots.txt.
- To view the robots.txt file of any website, simply add /robots.txt to the domain. The last line of the file will indicate the location of the sitemap.
- Keep in mind that if the website has a non-standard sitemap location, the robots.txt file should indicate it.
I have the entire article about how to find the sitemap of a website if you want to dive deeper.
Step 3: Check the XML sitemap in GSC
A crucial step in auditing an XML sitemap is to check the Sitemaps report in Google Search Console.
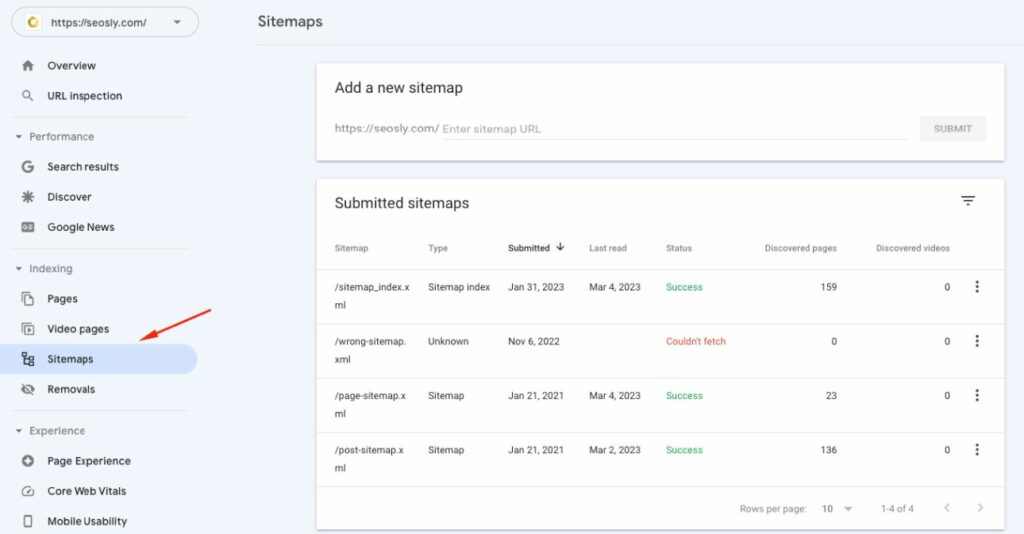
This report provides valuable information about your sitemap, such as:
- whether an XML sitemap or an index of XML sitemaps has been submitted to Google,
- whether there are any issues with fetching the XML sitemaps,
- and whether there are any indexation issues with the URLs that have been submitted.
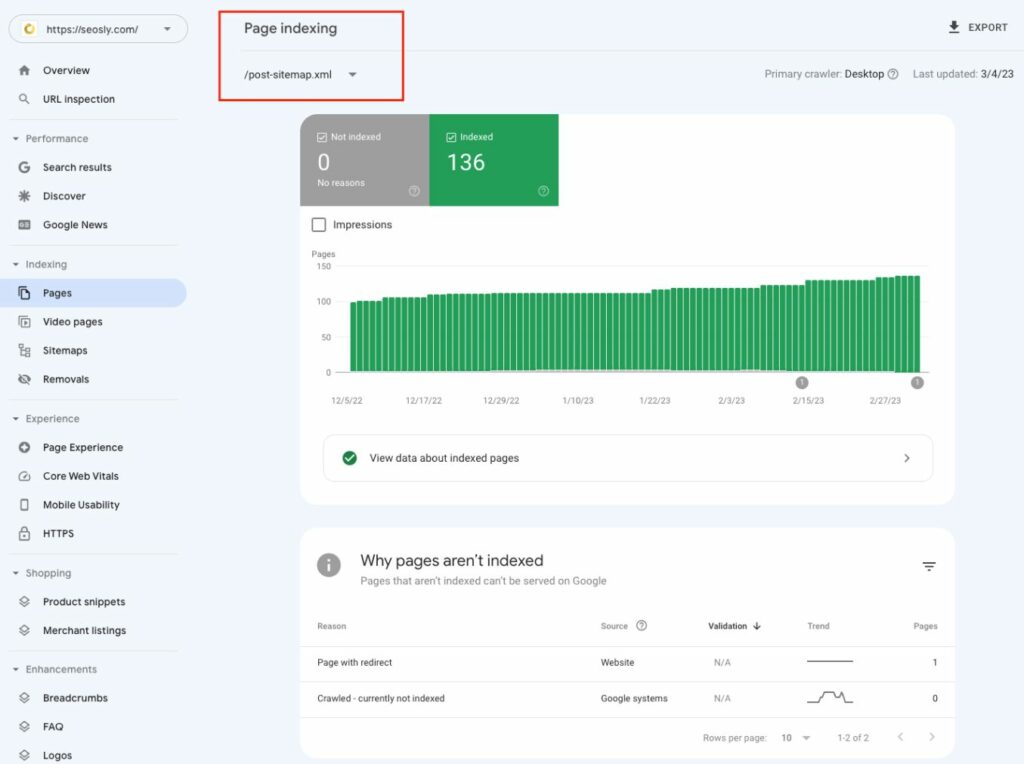
By checking this report, you can get a clear picture of how well the XML sitemap of the site you are auditing is performing and whether there are any issues to fix.
This step is essential to ensuring that the important pages of the site you are auditing are being crawled and indexed effectively.
So, don’t forget to check the Sitemaps report in Google Search Console as part of your XML sitemap audit!
Check my article about how to add an XML sitemap to Google Search Console.
Step 4: Crawl the XML sitemap
Another step in auditing an XML sitemap is to crawl it with a dedicated crawler tool such as JetOctopus, Screaming Frog, or Sitebulb. There are two methods to approach this step.
Method 1: Crawl both the website and the XML sitemap
The first method is to crawl the entire website together with the XML sitemaps so that the crawler can check what URLs of the website are indicated in the XML sitemap, if there are orphan URLs, if the URLs indicated in the XML sitemap are correct, etc.
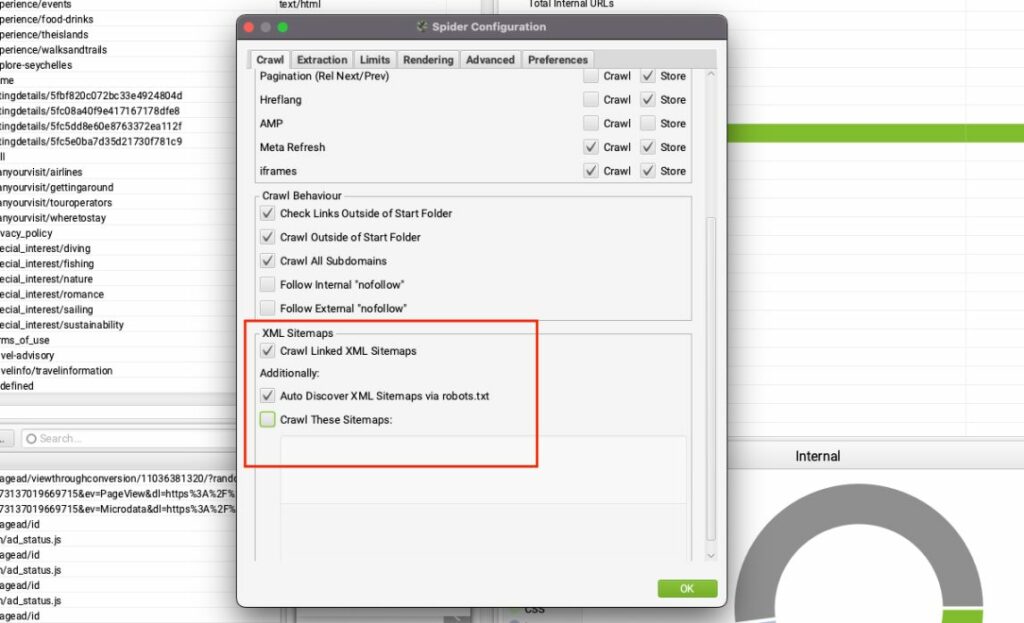
Each of the above-mentioned crawlers lets you configure them to crawl both the sitemap and the website before starting the crawl.
Here is how to configure Screaming Frog to crawl both the site and the sitemap:
Here is the Sitemaps report in Screaming Frog and the issues it checks:
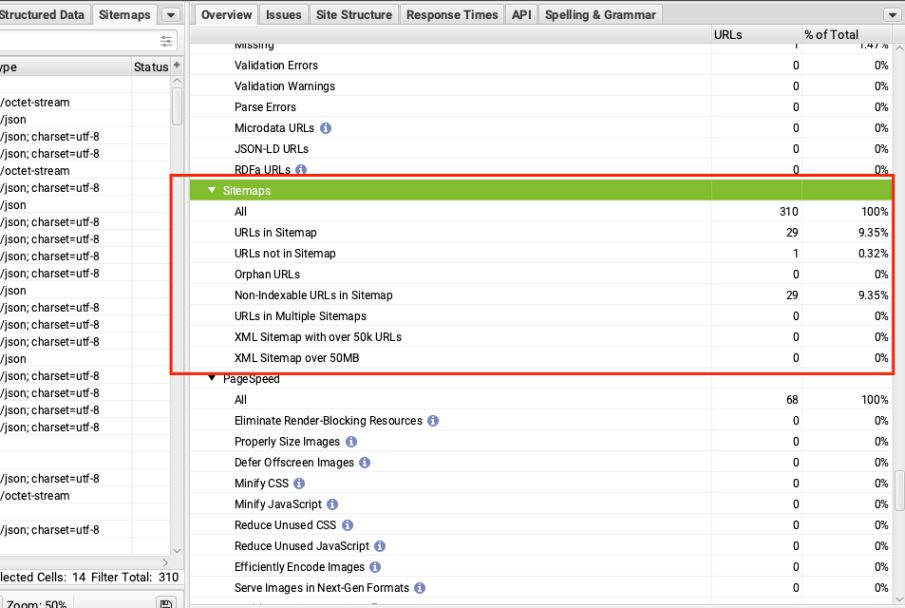
When crawling the site and the XML sitemap with Screaming Frog, don’t forget to run the Crawl Analysis after the craw has finished (in the top bar) to populate the data in the Sitemaps report.
Method 2: Crawl the XML sitemap only
The second method is to only crawl the XML sitemap and check if the pages indicated return a status 200 (OK) or if they are redirected (status code 301 or 302), return a 4xx status, or are canonicalized.
This step is particularly important for large websites as it can negatively impact the crawl budget (which refers to the amount of time and resources search engines allocate to crawl a website).
If a website has a large number of incorrect URLs in its XML sitemap, it can indicate that search engines are wasting their resources and not crawling the important pages.
Therefore, you need to make sure that all the pages indicated in the XML sitemap are canonical and indexable URLs returning status code 200 (OK).
You can use Screaming Frog, JetOctopus, Sitebulb, or any similar crawler to crawl the XML sitemap only.
Here is how to configure Screaming Frog to crawl the XML sitemap only:
- In the top bar, select Mode > List.
- Then click on Upload and select Download XML Sitemap.

- Enter the XML sitemap URL or the URL of the XML sitemap index. Hit OK.
- Screaming Frog will read the file. Once it’s done, click OK.
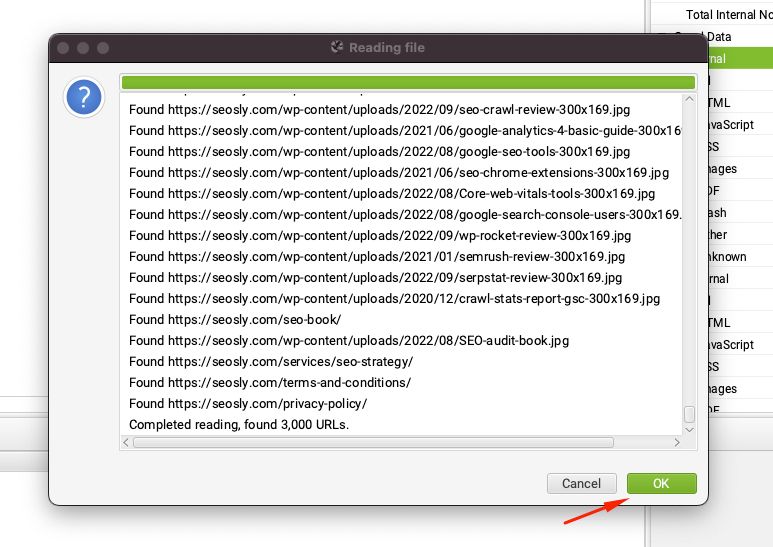
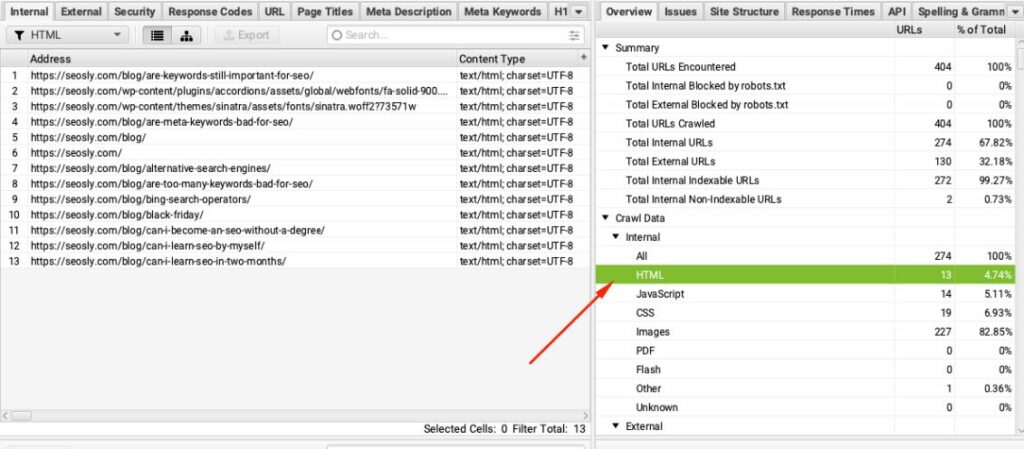
Once Screaming Frog crawls the sitemap, you can analyze all the URLs in the standard Internal > HTML report as all URLs from the sitemap will be displayed there.
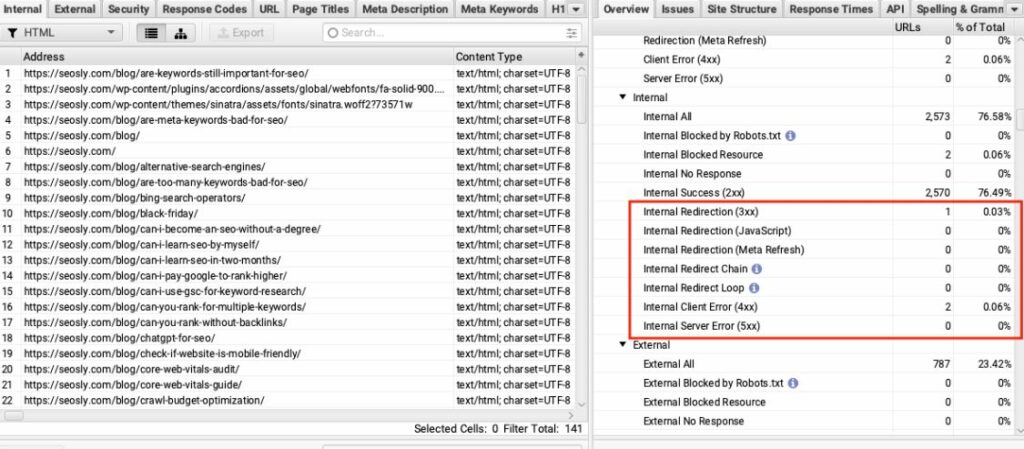
Of course, also check other reports like Canonicals, Response Codes, etc. This will be very juicy because you all be specifically analyzing ONLY the URLs from the sitemap. This means that you don’t want to see anything in the reports like Redirection, Client Error, Server Error, etc.
Final thoughts & tips on auditing XML sitemaps
This was supposed to be a quick and short article but I went overboard as always. Anyway, I hope you learned something new from this article and you have just become a better SEO auditor.
Make sure to check my other articles about sitemaps and auditing websites with my favorite crawlers:

![YMYL Websites: SEO & EEAT Tips [Lumar Podcast] YMYL Websites: SEO & EEAT Tips [Lumar Podcast]](https://www.lumar.io/wp-content/uploads/2024/11/thumb-Lumar-HFD-Podcast-Episode-6-YMYL-Websites-SEO-EEAT-blue-1024x503.png)

