Bing Places for Business: Set Up Your Bing Business Listing
Bing Places for Business is a free online local business directory. Listed businesses appear on the top or right side of the Bing search results page. And contain information like address, contact details, and operating hours.
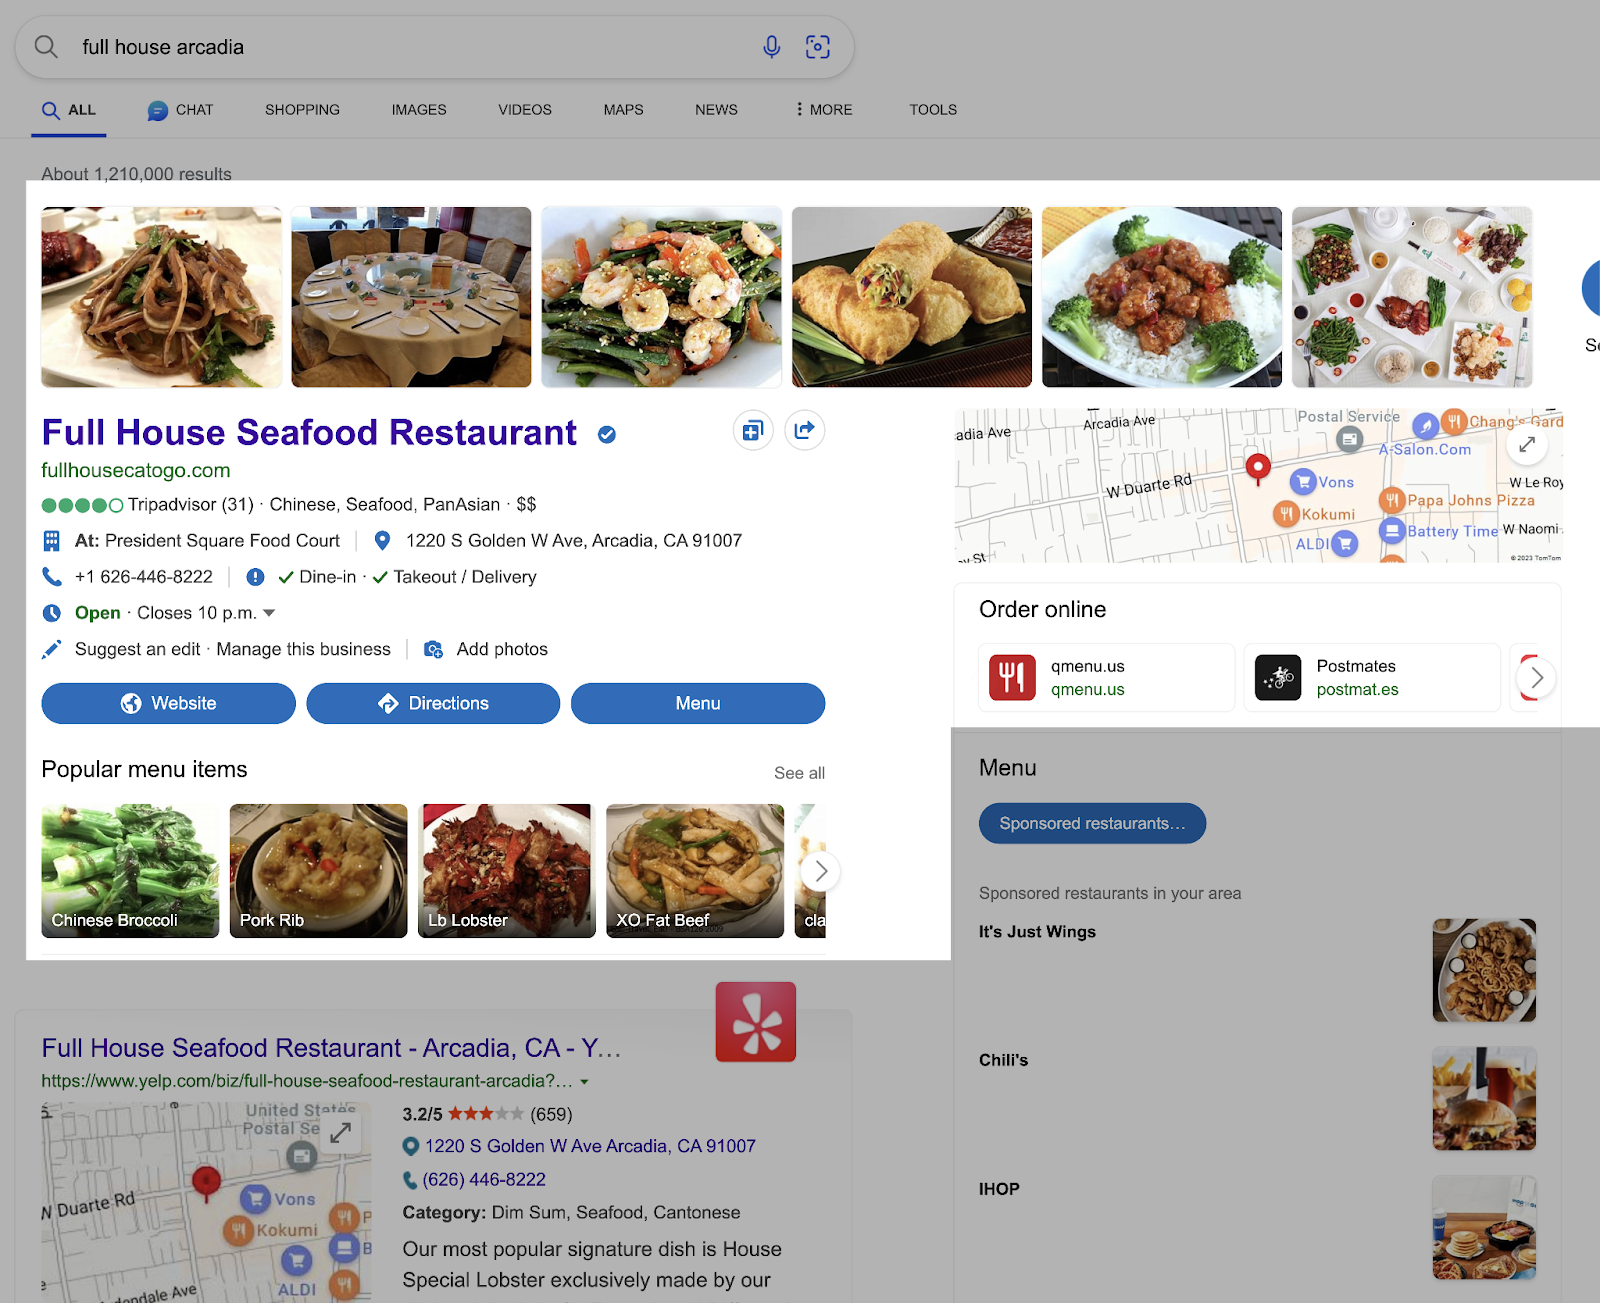
Your business listing can increase your brand’s online visibility through improved local searchrankings on Bing and Bing Maps.
Here’s how you can get your business in front of more eyes by setting up your Bing Places for Business account. And four tips on how to create a strong listing.
How To List Your Business on Microsoft Bing
Here’s how to list your business on Bing to make it more visible to the right searchers.
1. Create or Sign In to a Microsoft Account
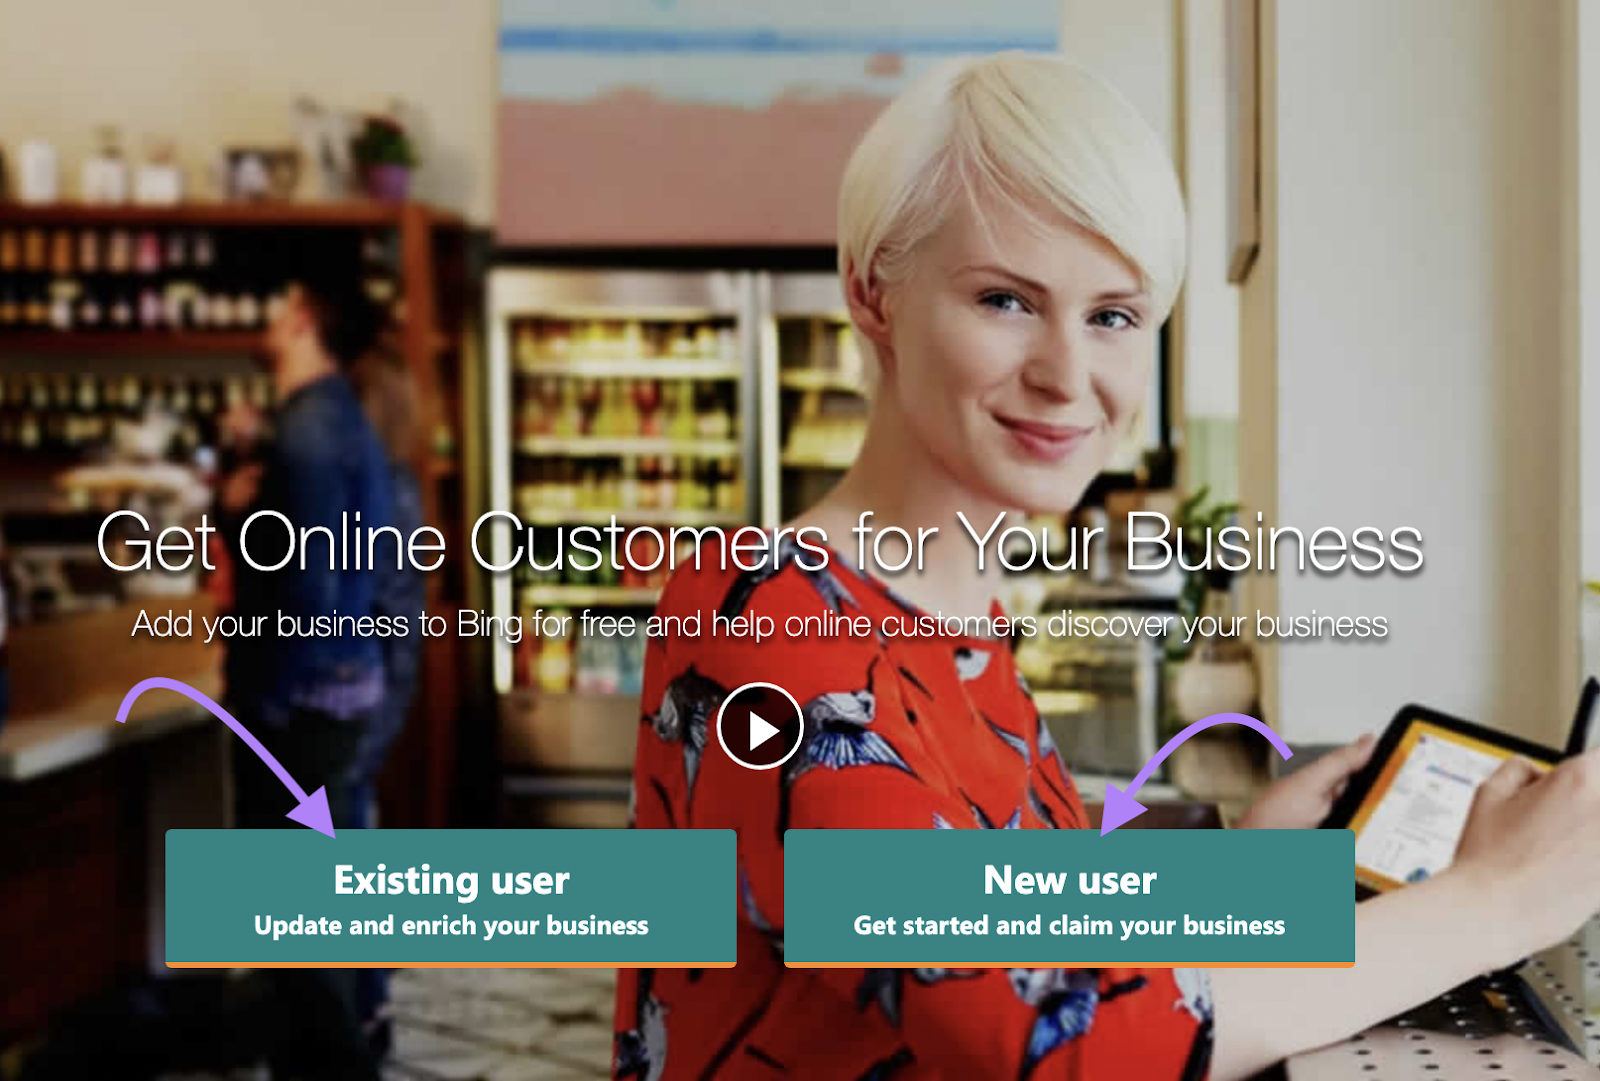
Visit the Bing Places for Business website (bingplaces.com) and sign in to your Microsoft account by clicking “Existing user.”
If you don’t already have one or want to create a new account specifically for your business, click “New user” instead.
A prompt will ask you to choose an email address and password before you solve a quick CAPTCHA test.
Bing will then send you a verification code. Once you’ve confirmed your sign-up using that code, move on to the next step.
2. Claim or Create Your Business Listing
Bing offers two ways to create a business listing. You can either import details from an existing Google Business Profile listing or create a Bing Places for Business listing manually.
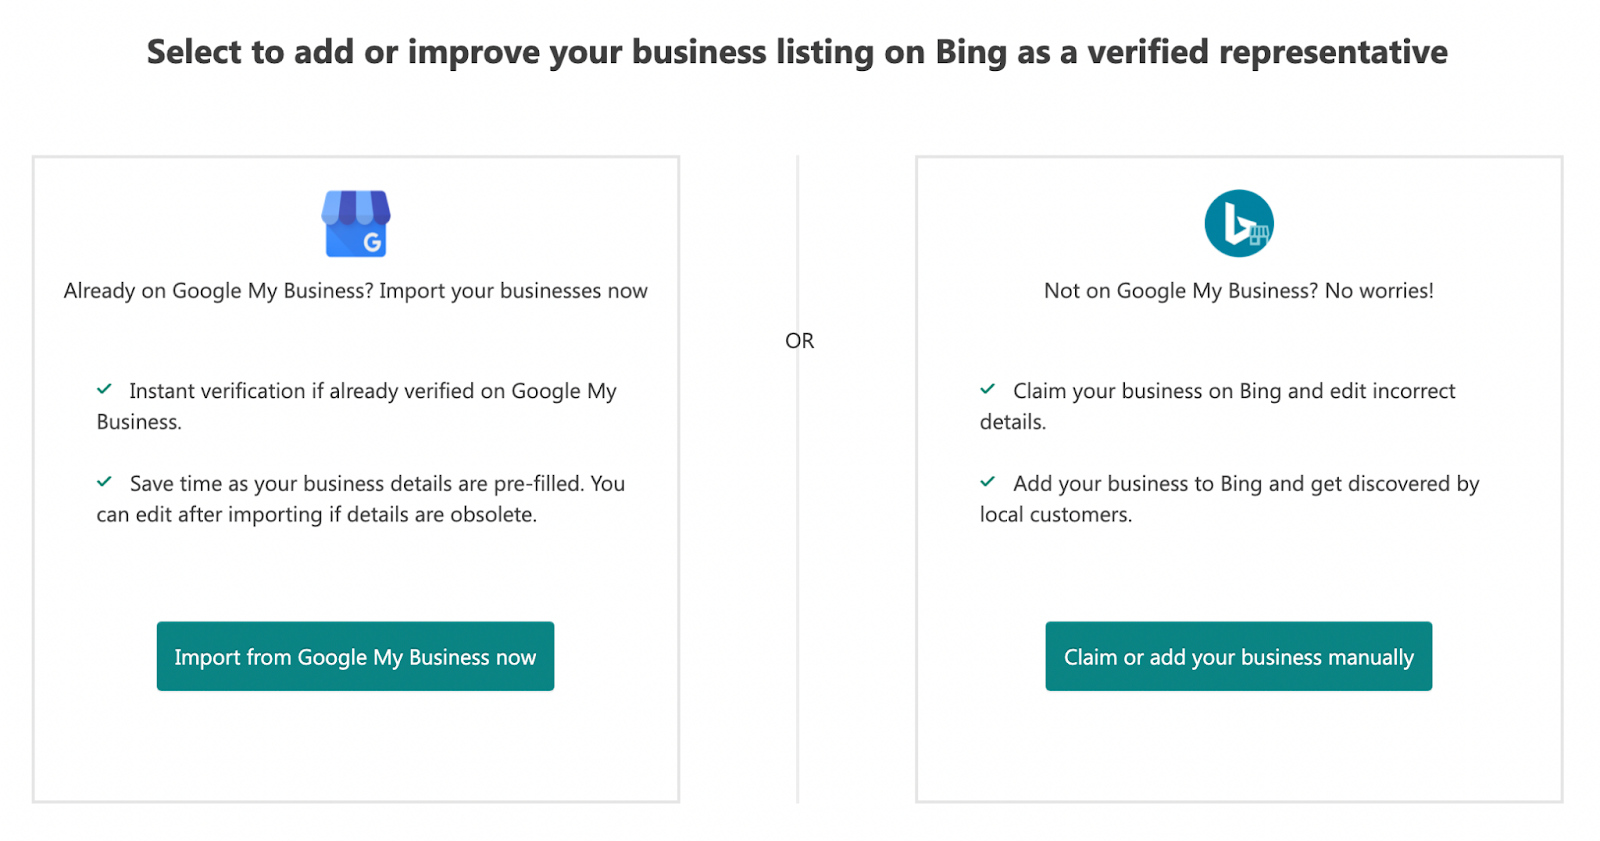
If you have an existing Google Business Profile, click the “Import from Google My Business now” button to import your listing from Google. And choose the Google account you set your business profile up with.
Then, choose the business you want to import (if you have multiple brands). And hit “Continue.”
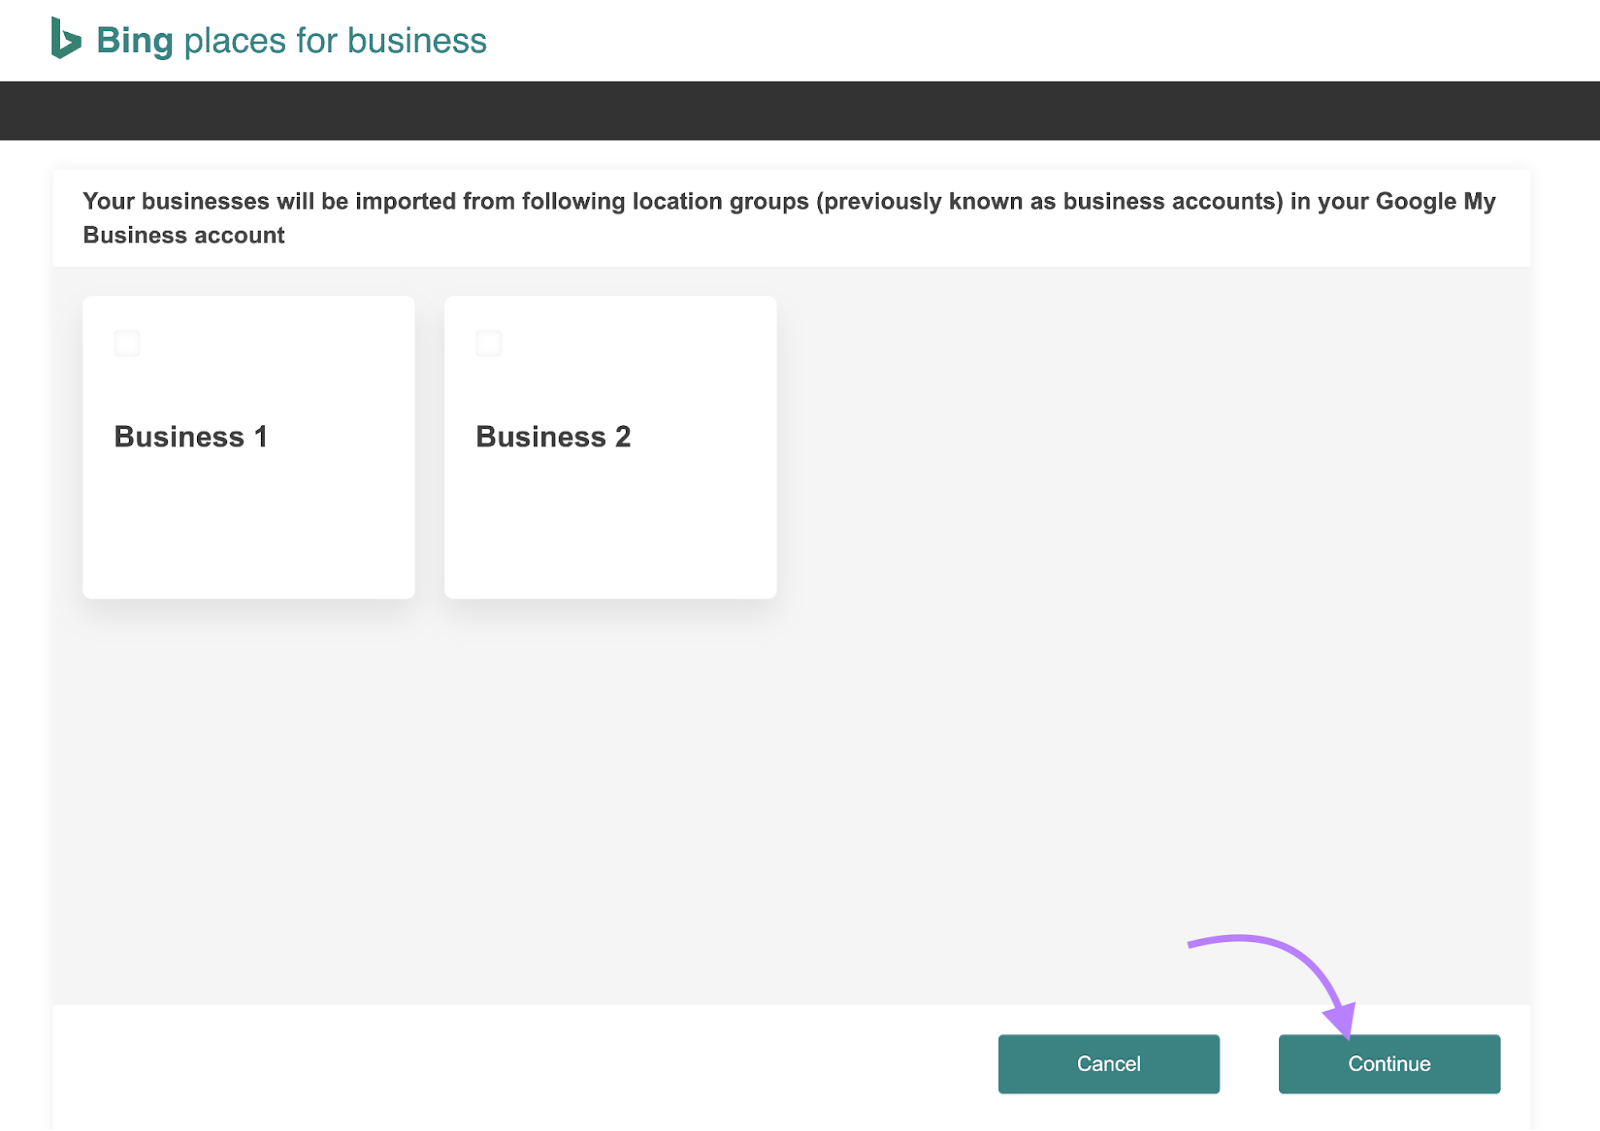
Bing Places for Business will automatically copy the details from your Google listing. You’ll also get instant verification, provided your listing is already verified on Google Business Profile.
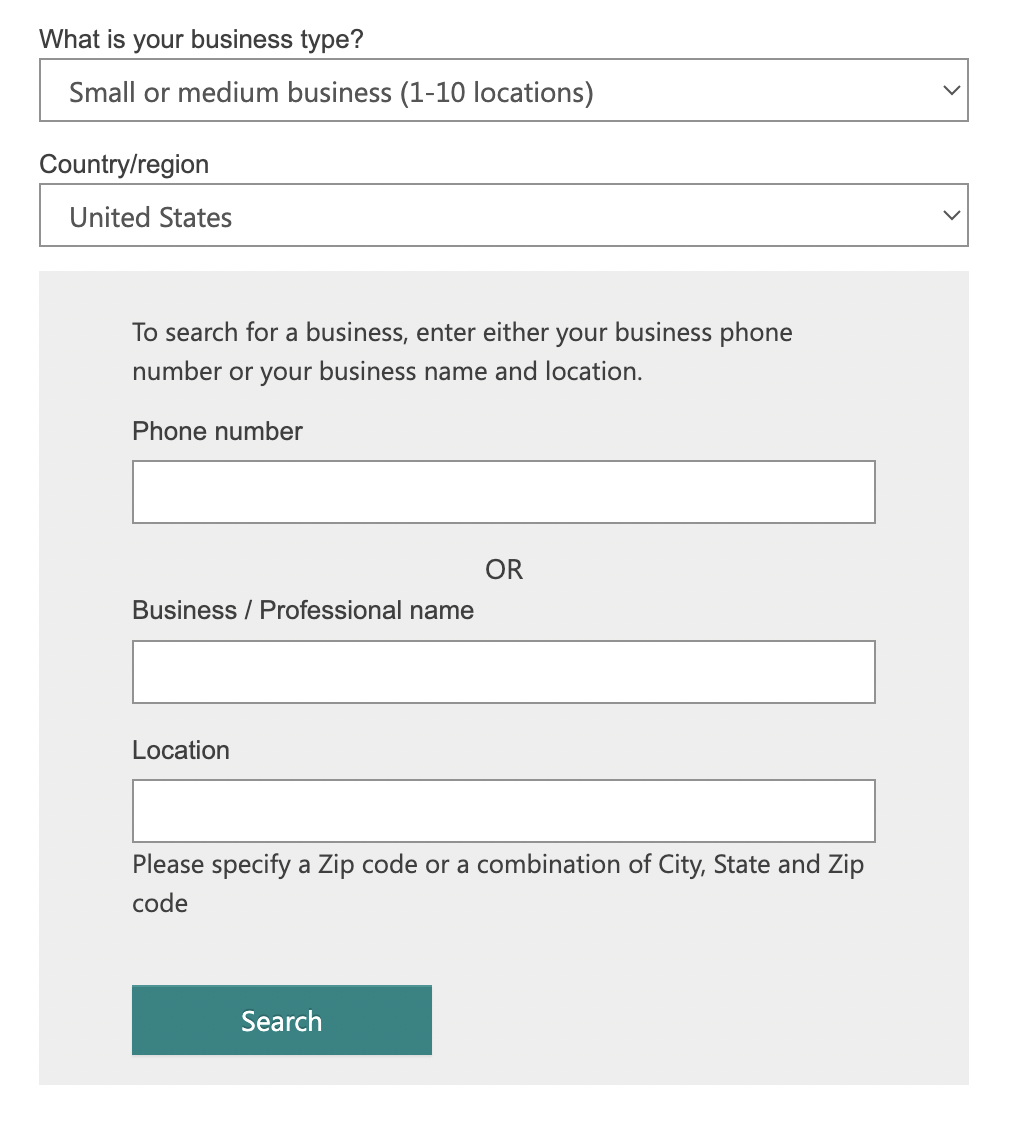
To set up a business listing on Bing manually, choose your business type and location from the drop-down menus. Then use the search box that appears to enter your basic business details.
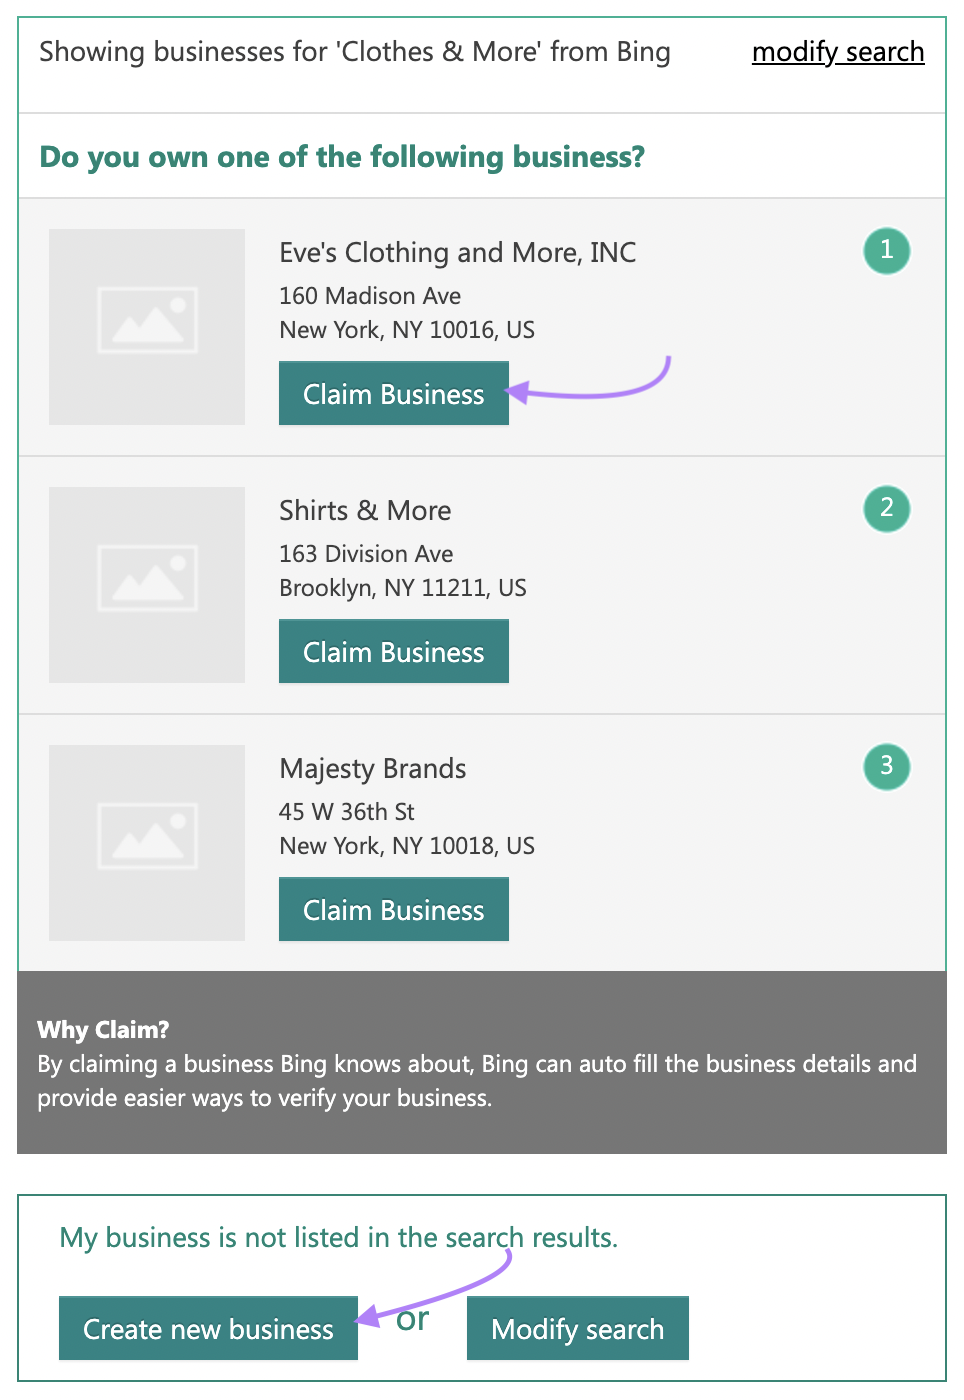
Bing will return any listings that match the details you entered. If your business is one of them, click “Claim business.” If not, click “Create new business.”
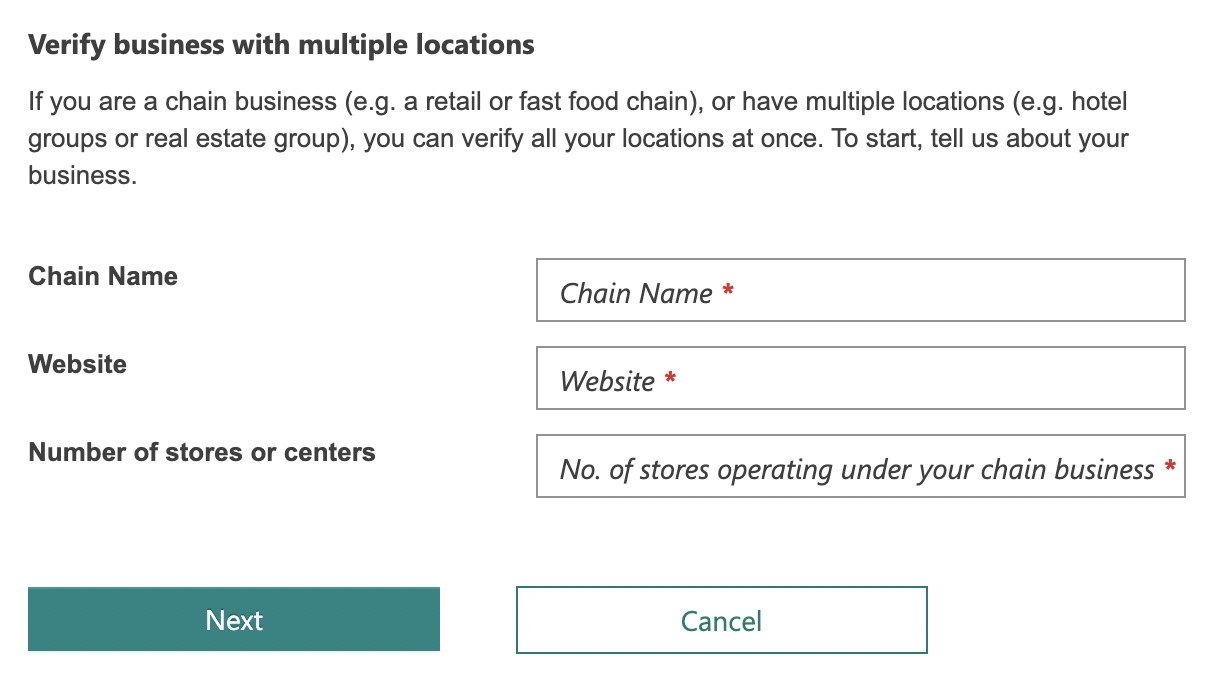
The verification process is slightly different when creating listings for a chain business with more than 10 locations.
First, provide your business’s name, website address, and the number of locations you’re adding. On the next screen, add specific details for each location.
3. Complete Your Business Listing Information
The next step is to start fleshing out your listing with contact information and other details. Using the on-screen text fields and drop-down menus, you can add:
- Business name
- Phone number
- Address
- Website address
- Business segment (what sector you operate in)
- Up to 10 categories (what your business actually does)
- Description
- Social media profiles
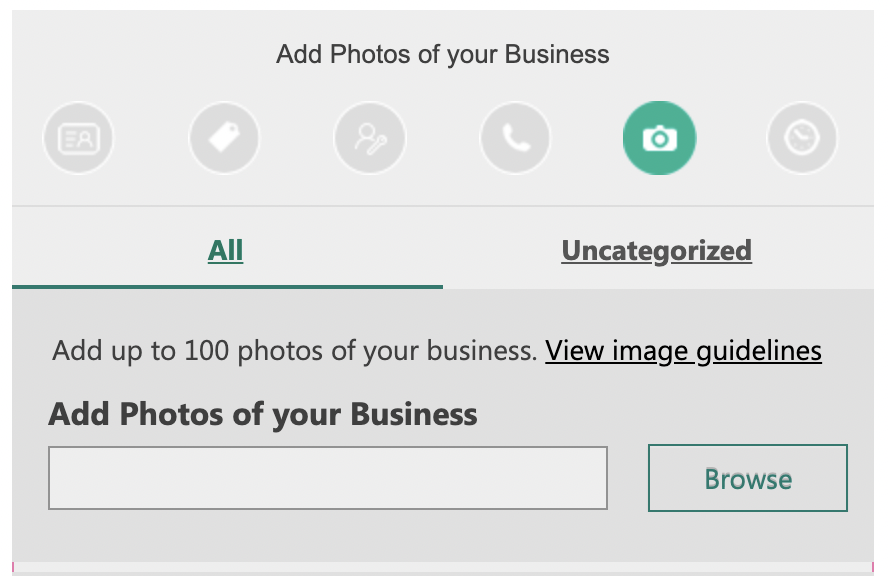
- Up to 100 photos of your business
- Links to other directory profiles (like Yelp)
- Hours of operation
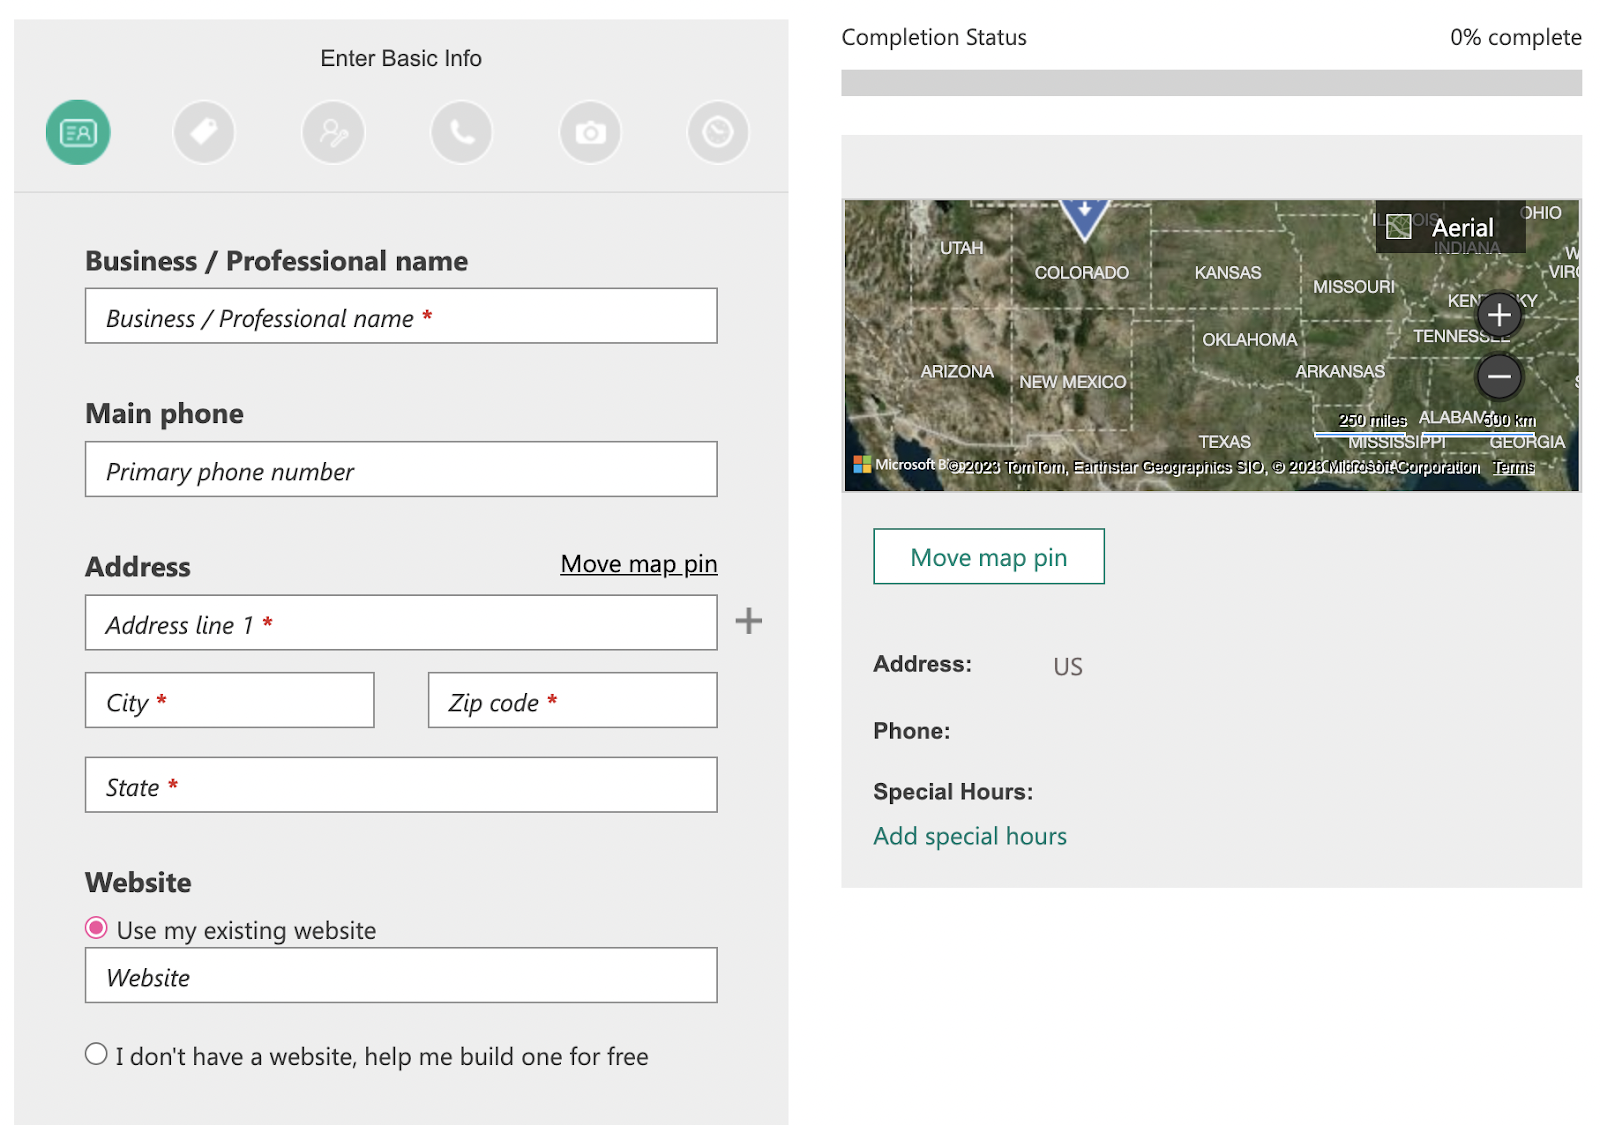
Most of the business information you input will be visible on your final listing, so make sure the information is accurate and comprehensive.
You want to give searchers all of the information they need to take their next step, whether that’s getting in touch or finding your products.
Also, add as many high-quality photos as possible. These can help your listing stand out while helping searchers find what they’re looking for faster.
4. Verify Your Business Listing
Finally, you’ll have to complete a verification step to prove that the business you’re listing is both real and actually yours.
Based on the information you provide, you can verify your account by:
- Entering a pin you receive through a call or SMS to your registered business phone number
- Verifying your account through an email that you’ll receive within 15 minutes of your verification request
- Answering a set of questions from Bing
- Entering a pin you receive through a postcard sent to your business address (this may take up to 12 days)
After you’ve verified your account, your listing will show up for potential customers to see.
4 Tips for a Strong Bing Business Listing
Creating a listing on Bing Places for Business will improve your business’s online visibility. But to get the most from your listing, you need to optimize it.
Take the following steps to influence how well your listing ranks in results across Bing Search and Maps and capture more interest from searchers.
1. Conduct Keyword Research
Keyword research is all about finding out what your potential customers search for. So that you can use those search terms to optimize your listing and appear higher in relevant search results.
Let’s illustrate that.
Imagine you’re a business owner with a listing for a bakery in New York City. When people search for “bakery NYC,” you want your listing to appear first.
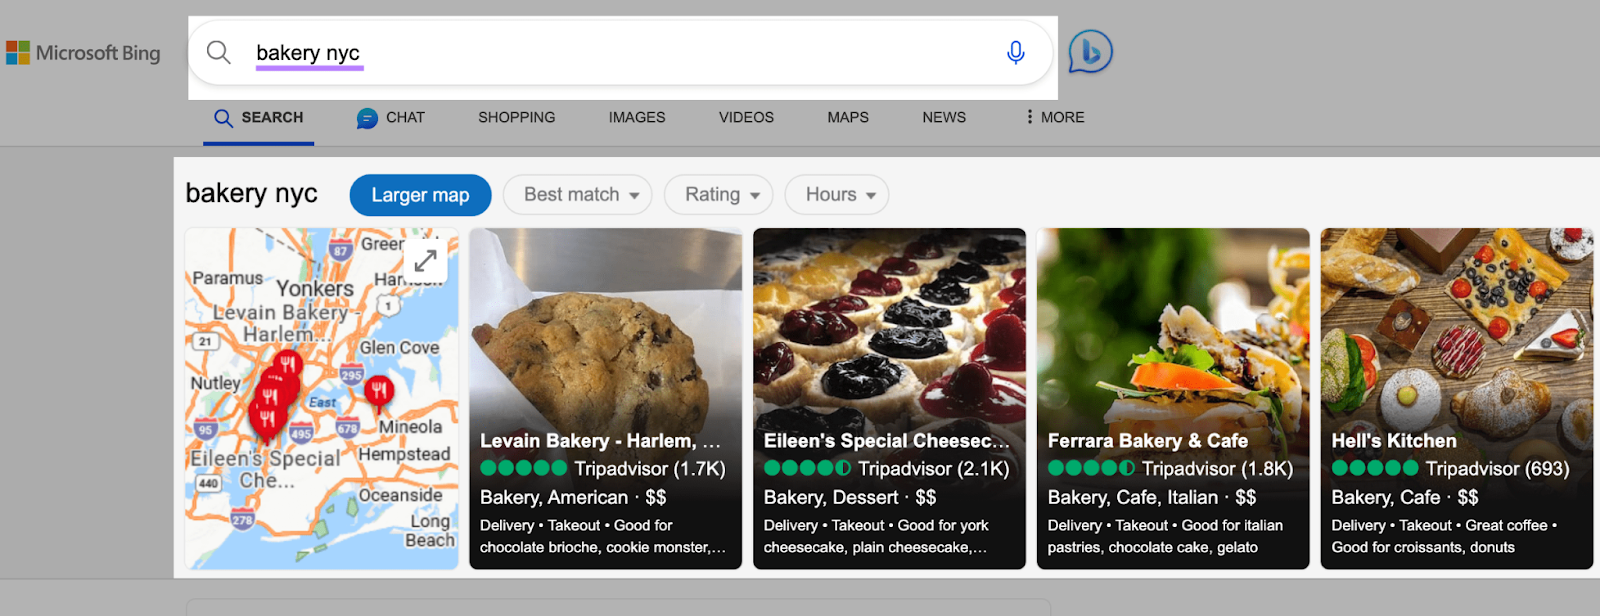
But to appear first, your listing needs to be more relevant than other potential results.
Increase your listing’s relevance by using keywords that Bing sees as important to the query you want to rank for.
Start by finding the right keywords to include in your Bing business listings.
To do that, use the Semrush Keyword Magic Tool.
Simply enter a seed keyword, like “bakery NYC” to get your initial list of potential keywords.

Then, take note of these columns:
- Intent: The motivation behind a search
- Volume: The estimated number of people who search for that keyword per month
- KD%: The estimated difficulty of ranking for that keyword
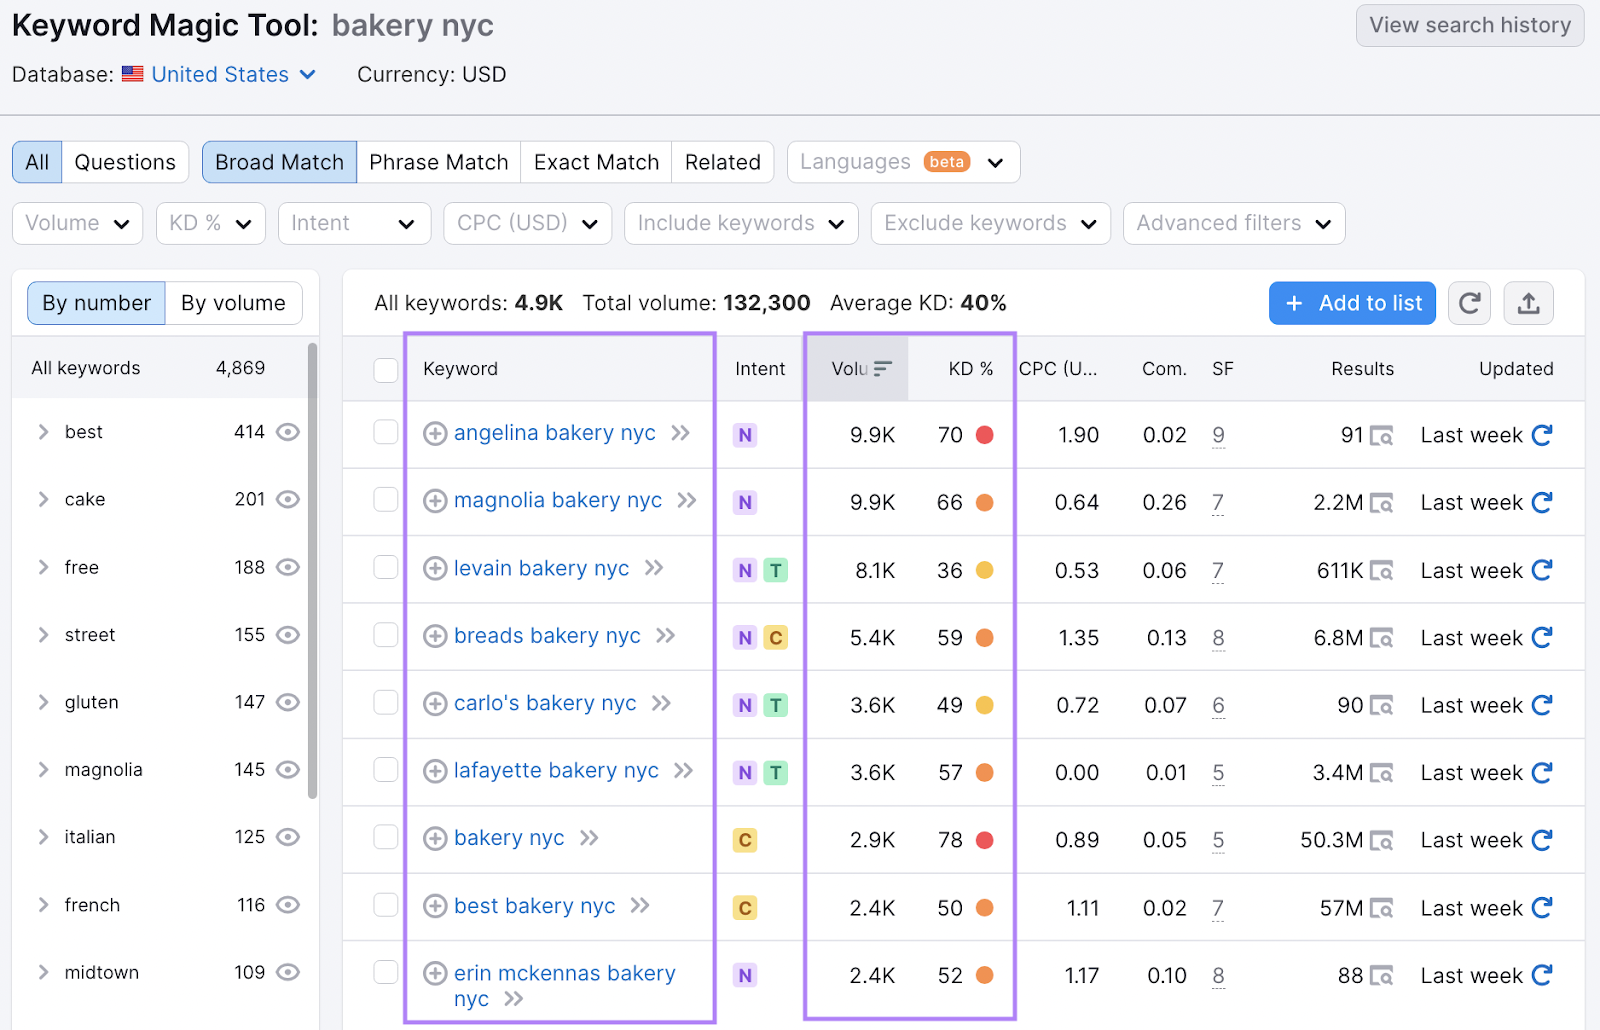
Create a list of keywords that have:
- Commercial or Transactional Intent. Keywords that people who are ready to buy search for)
- High monthly search volume. We recommend that you look for keywords with a search volume of at least 500 to 1,000 for smaller businesses
- Low keyword difficulty. We recommend looking for keywords with difficulties below 50%
If you need more keyword ideas, take a look at the keyword categories and variations in the sidebar to the left.
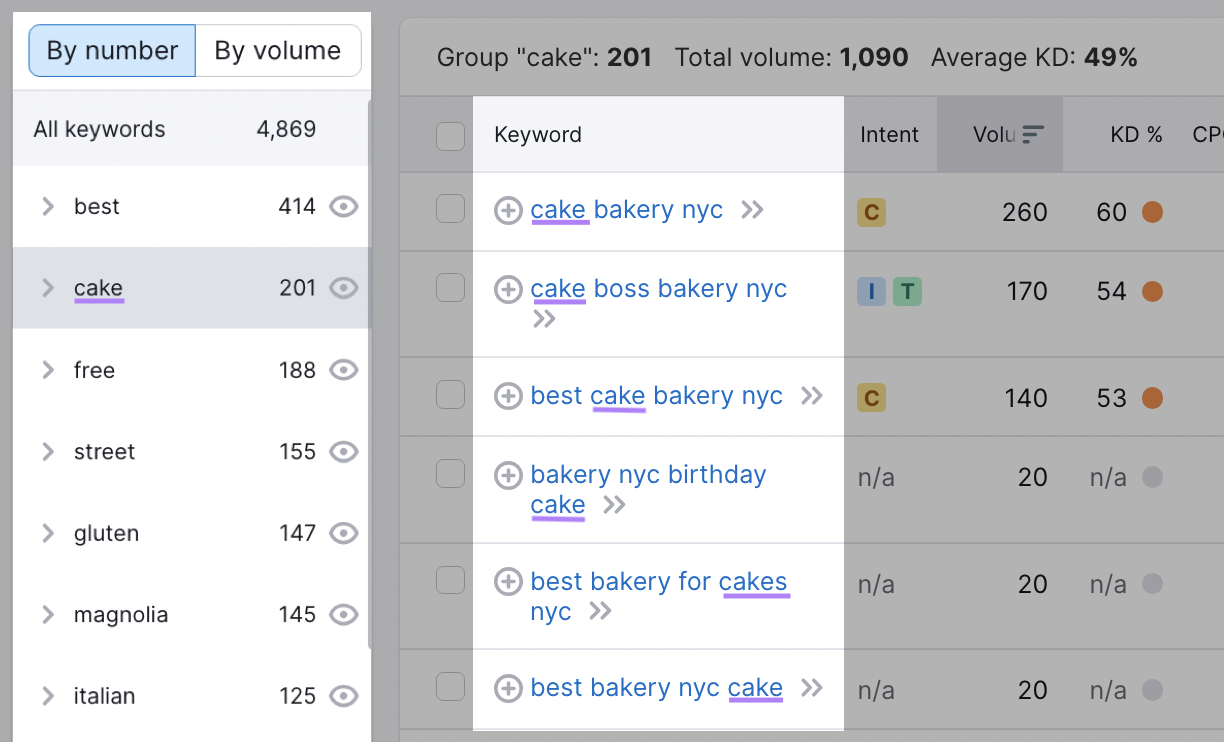
Continue to choose keywords relevant to your business that meet the criteria above
For example, if your bakery specializes in Italian, you can explore all of the keywords that include “Italian.” And choose the ones that best fit your type of business.
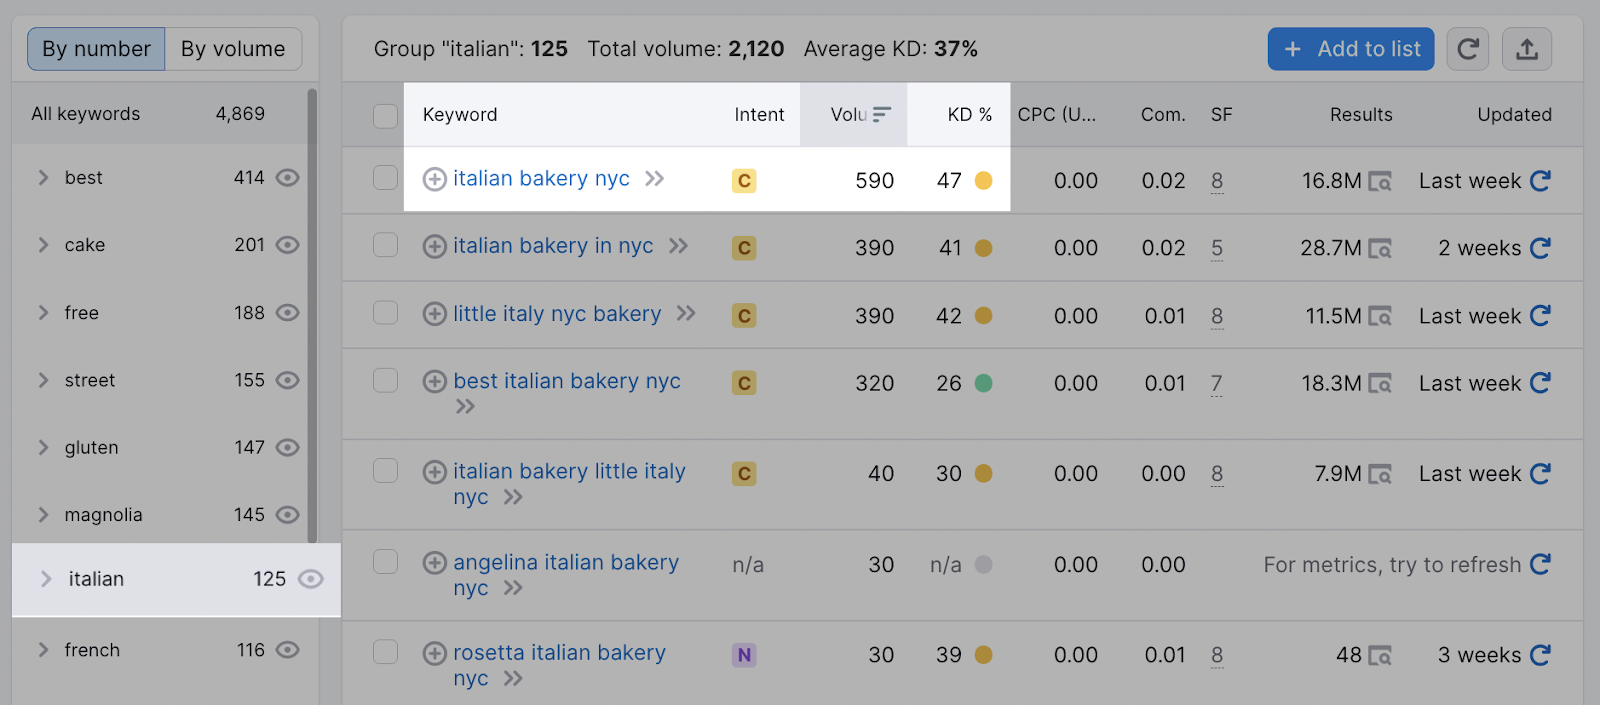
From the results above, “italian bakery nyc” seems like a good keyword to add to your list.
After you’ve compiled your list, update your Bing Places for Business listing title and description using the keywords you’ve found.
Take note: Avoid keyword stuffing. Include your target keywords naturally so your listing reads well and can be easily understood.
2. Focus on Earning Reviews
Positive customer reviews show searchers that real people like your products. Which can encourage searchers to choose to visit your establishment over your competitors.
Prioritize acquiring reviews and raising your average review rating to get the most from your Bing Places for Business listing.
Get creative with how you ask your customers to give you feedback, like:
- Leaving printed QR codes on restaurant tables that lead to review sites
- Sending emails to customers, asking for a quick review in exchange for a reward
Since Bing Places for Business grabs reviews from third-party websites like TripAdvisor and Facebook, you can encourage customers to leave a review wherever is easiest for them.
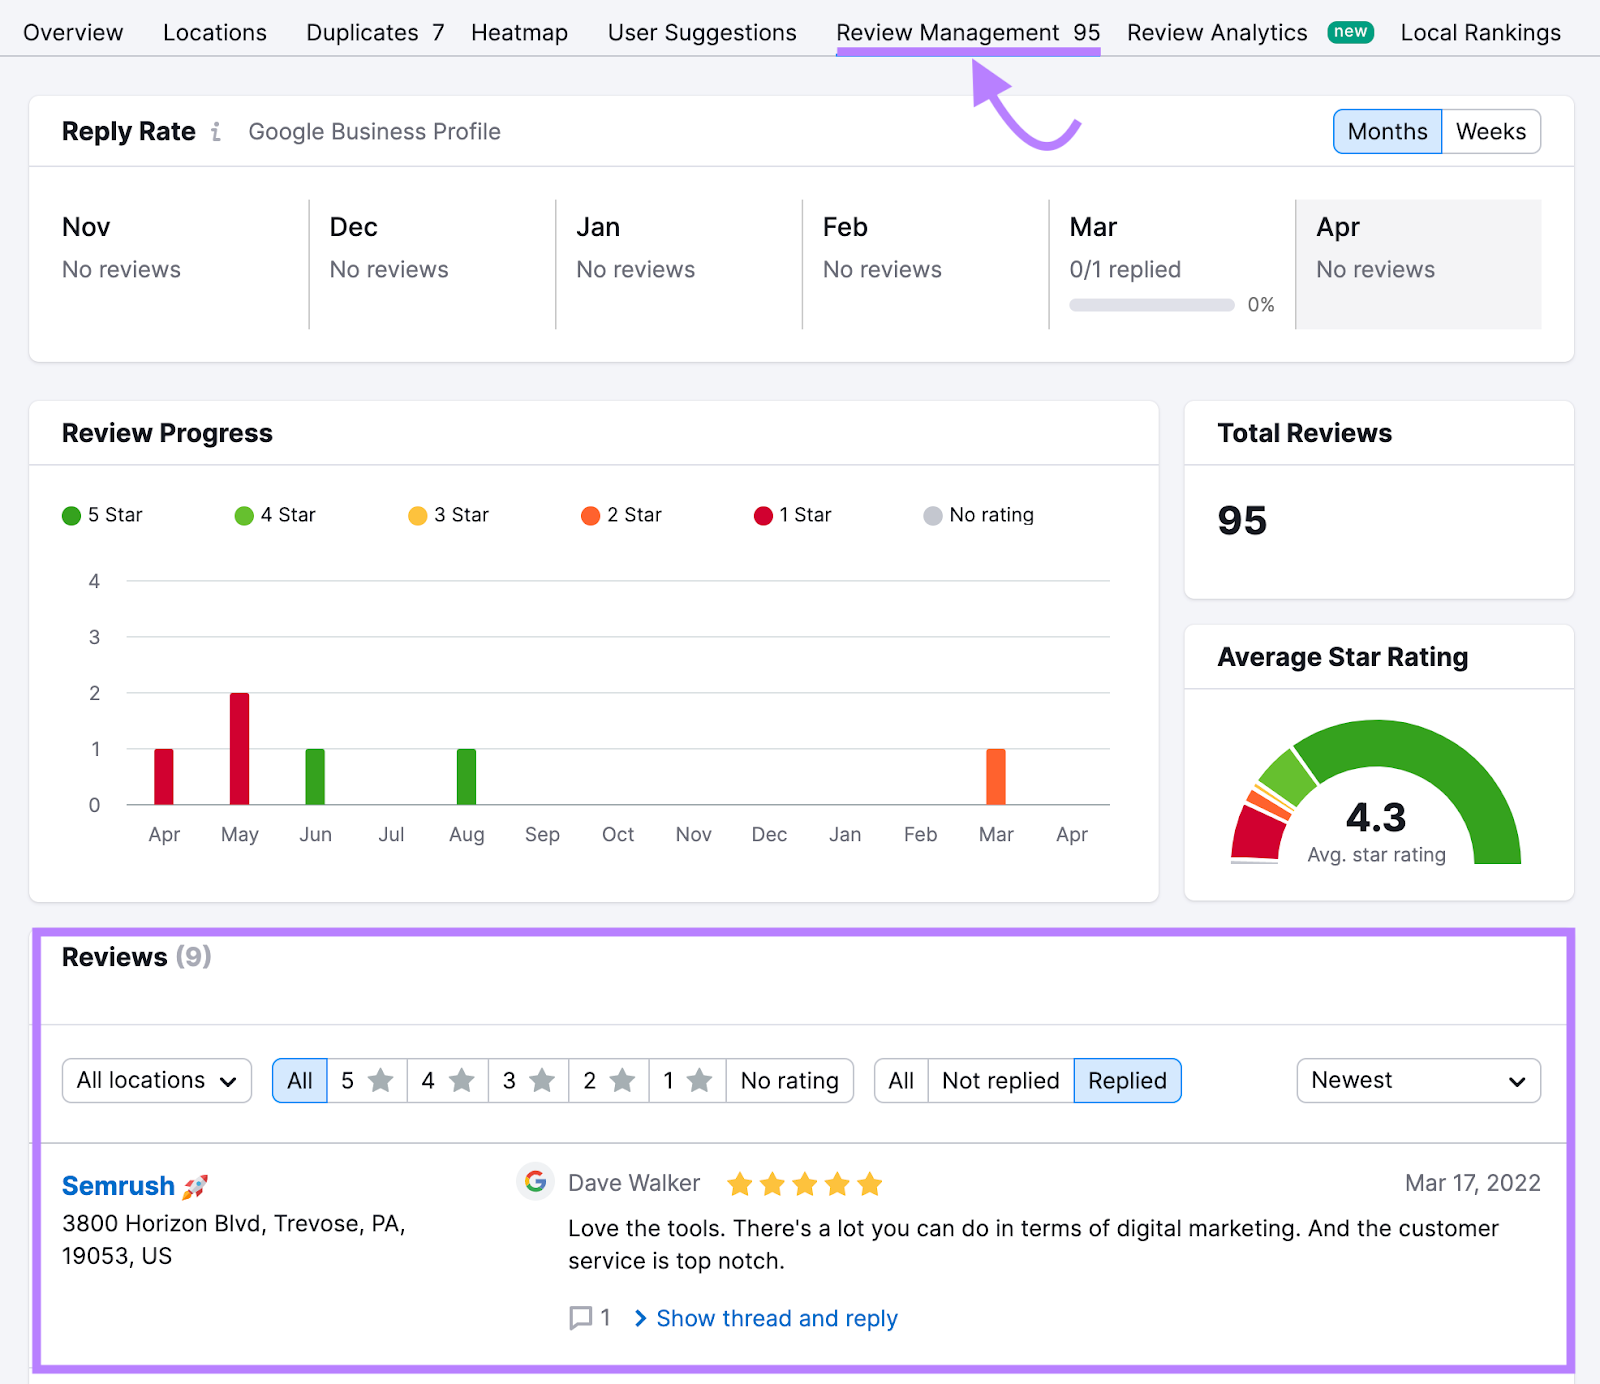
Pro tip: Easily manage your reviews across multiple platforms with Listing Management.
Although Bing hasn’t confirmed any ranking factors, reviews likely play a role. Listings with lots of reviews and high average ratings dominate search results.
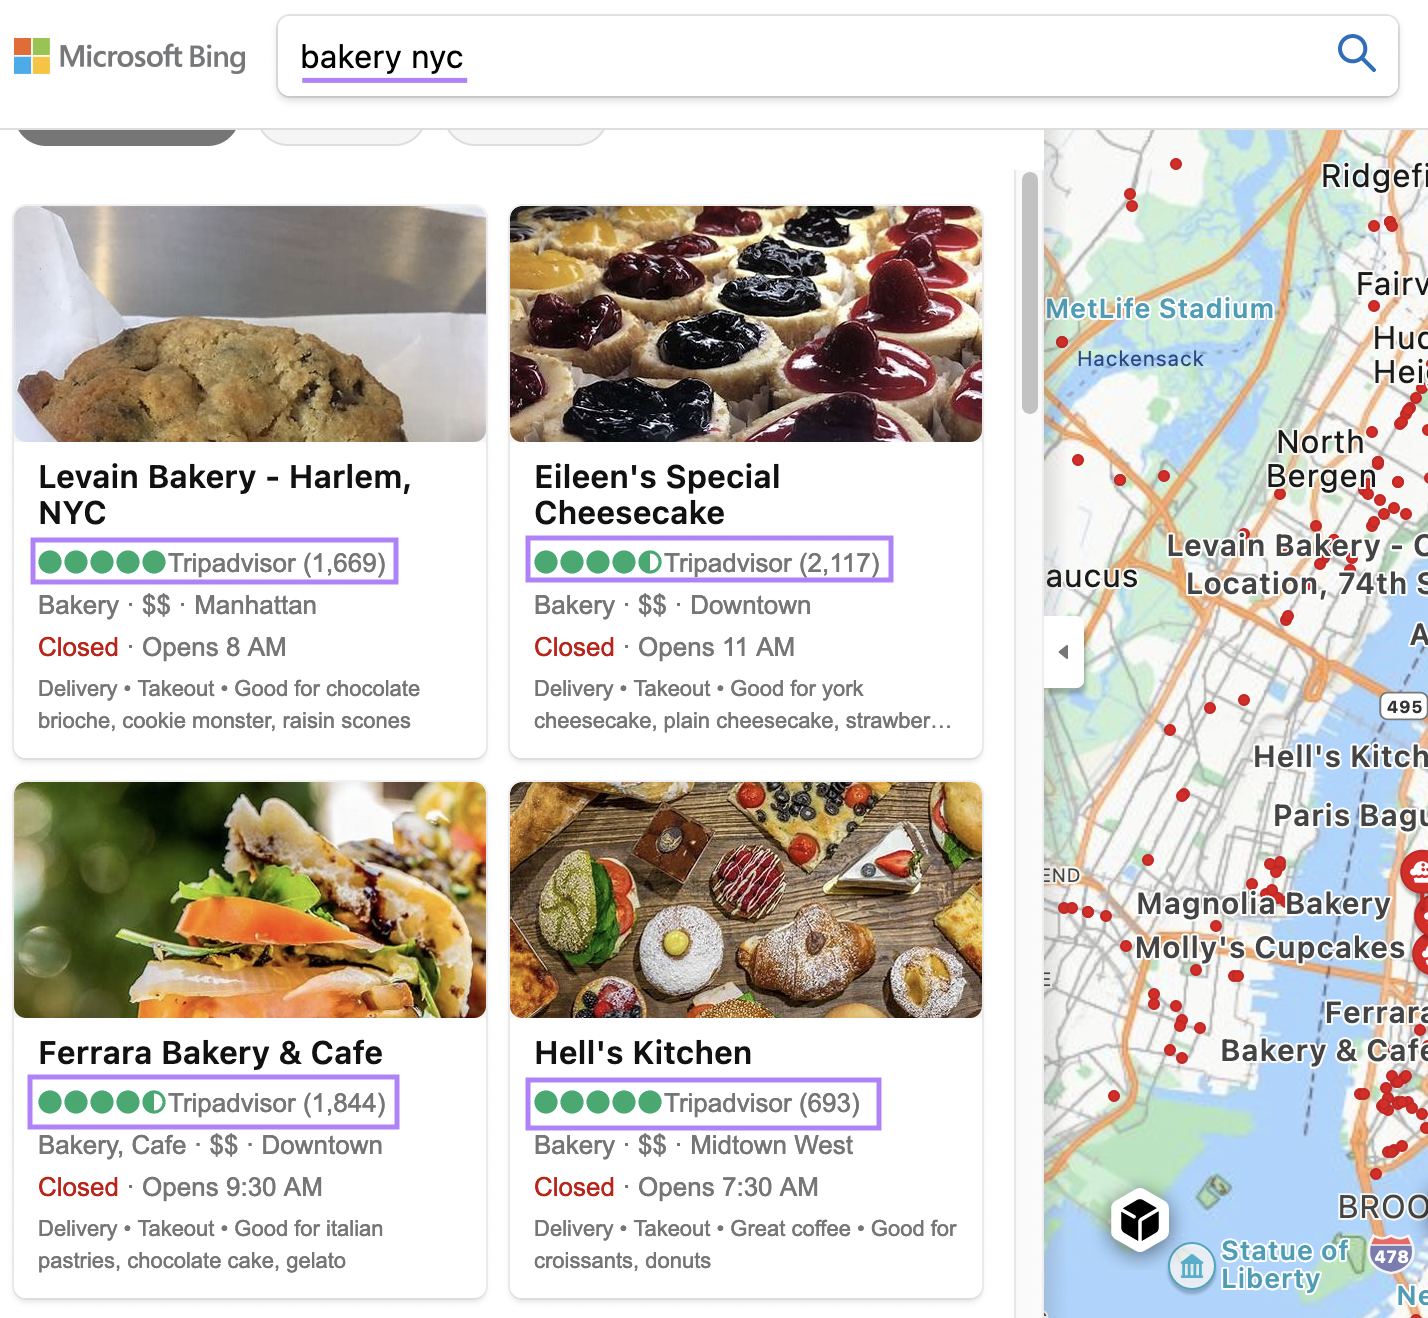
Building comprehensive and positive review profiles is one of the most compelling ways to get ahead on Bing Places for Business.
3. Pay Attention to NAP Accuracy
NAP means name, address, and phone number.
Make sure to enter the same exact NAP details across all online directories (e.g., Yelp, Google Business Profile, etc.). Because search engines like Bing pull information about your business from external sources—whether that information is accurate or not.
NAP consistency also makes it easier for searchers to find accurate information about your business.
If you use a different phone number across various online listings and your website, searchers won’t know which one to call.
You can keep your listings consistent manually by checking on each online directory one by one. The problem is, you may not be aware of all of your listings because a lot of directories auto-generate listings based on information found online.
For a more efficient way of managing your listings, check out Listing Management.
The tool will automatically comb through local online directories and update your listing based on your current information.
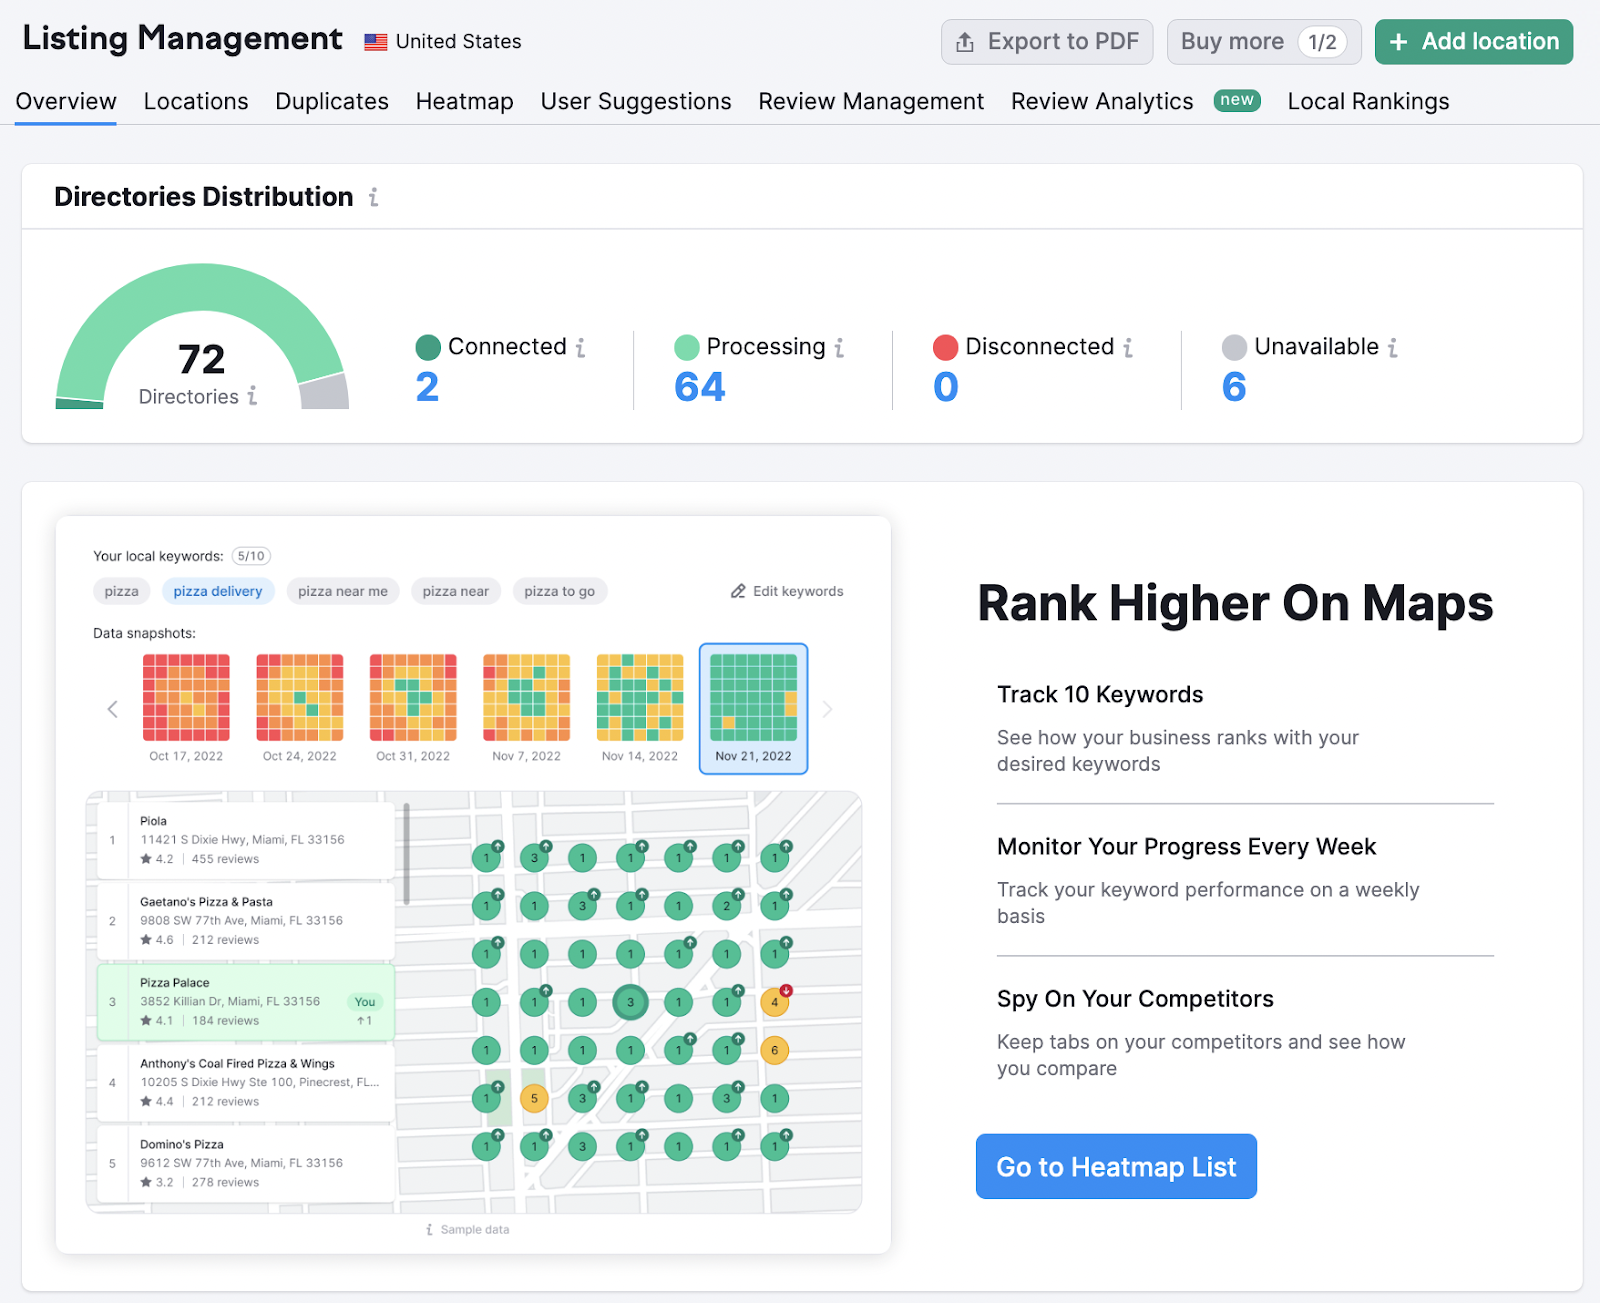
It will also automatically add your listing to over 70 local directories to further increase your visibility.
4. Add High-Quality Photos
Images play a large role on Bing search engine results pages (SERPs). Adding high-quality images that showcase your business and products can maximize the impact of your listing.
Choosing the right images will make your listing more attractive in Bing local listing results and encourage more clicks to your website.
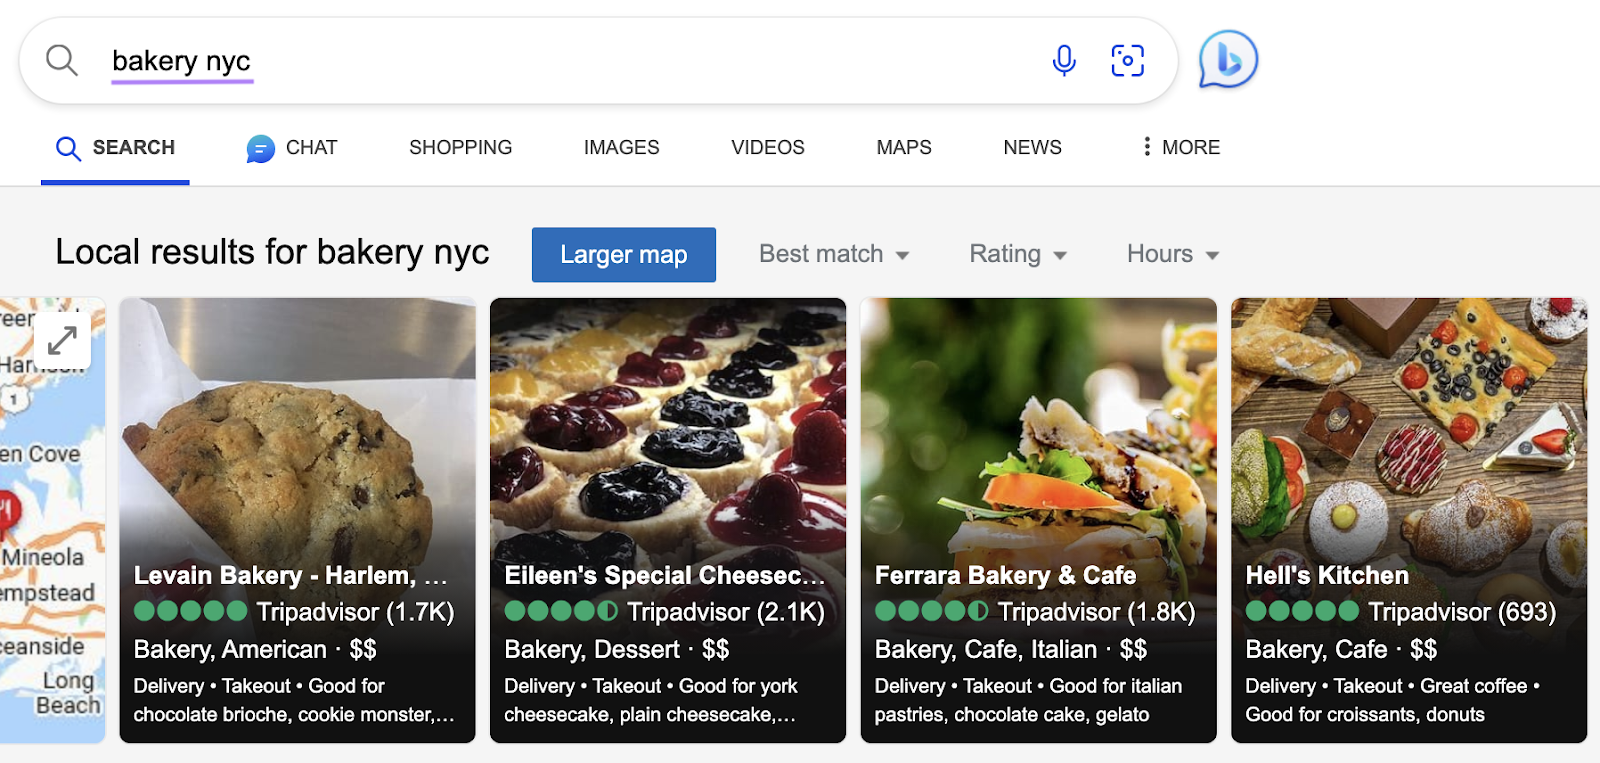
Visuals also take precedence in Bing Maps results, with business listings displayed in an image-heavy sidebar.
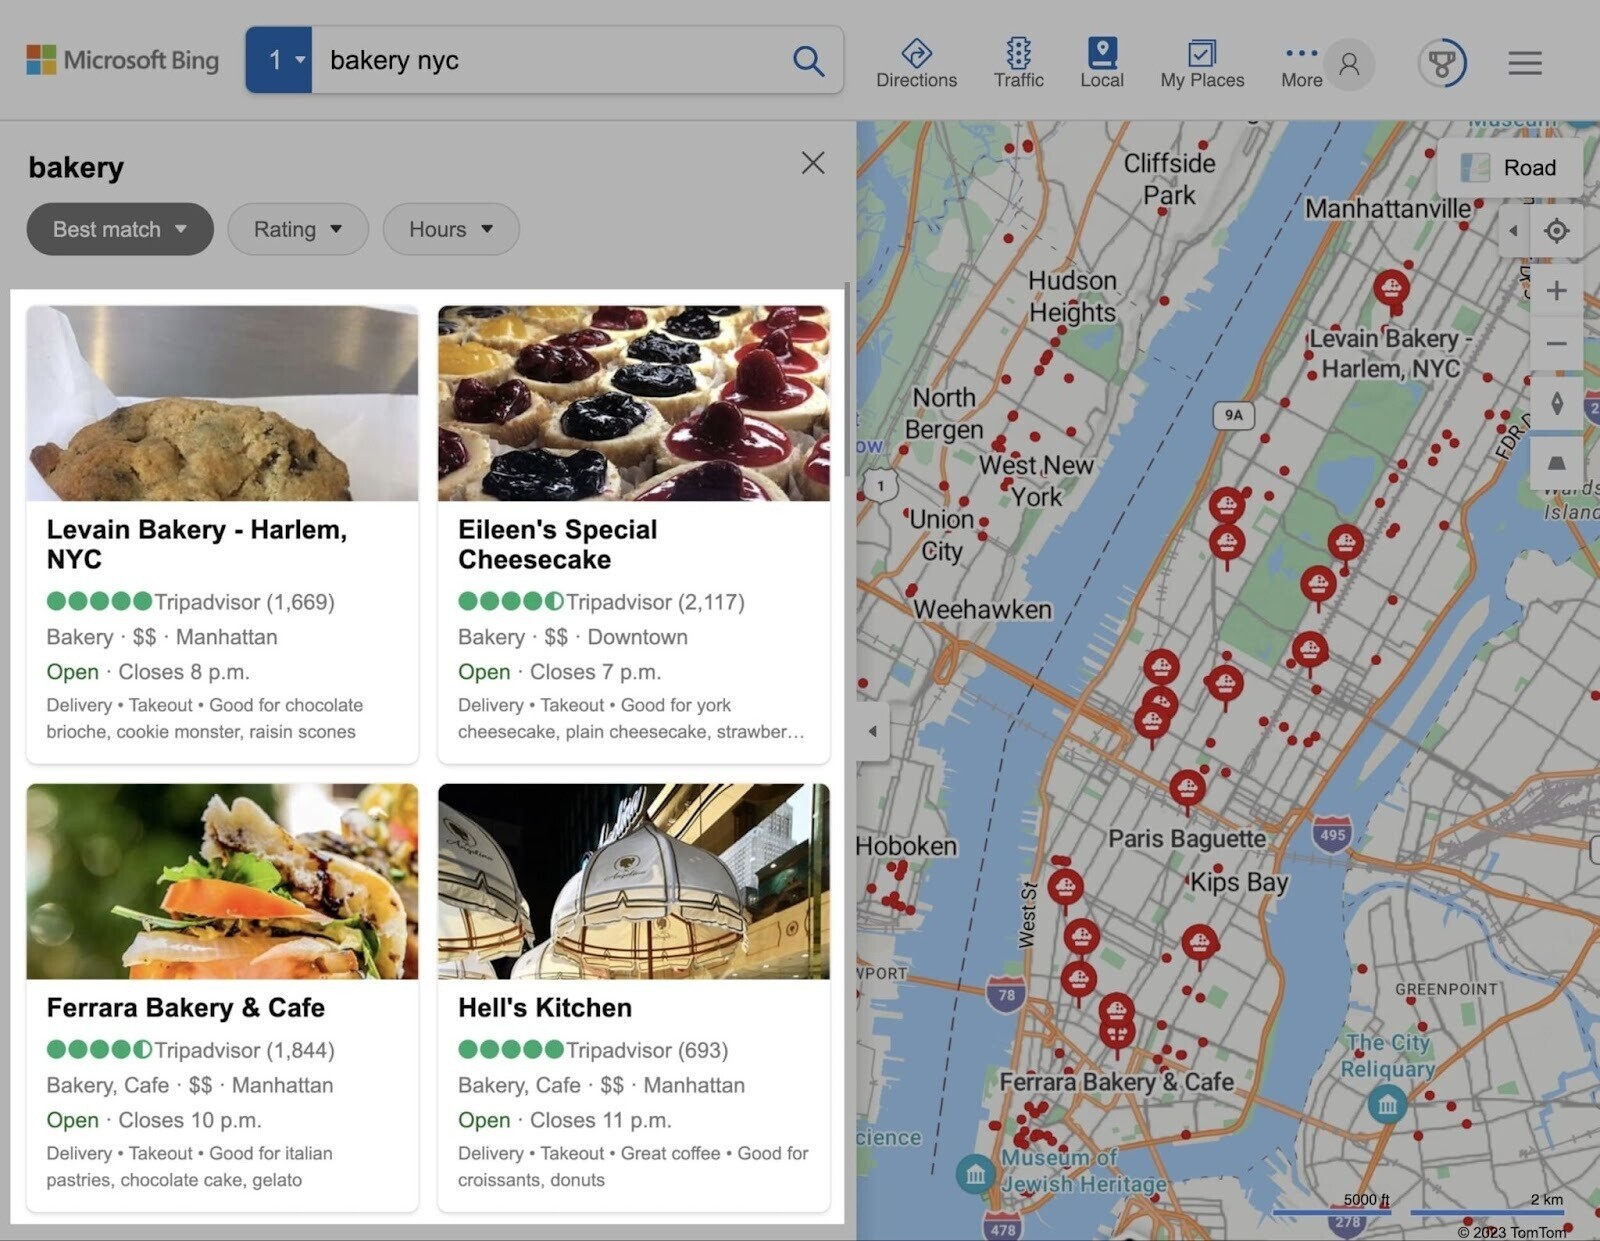
A strong image gallery can also make your listing more useful, showing off your storefront, products, and more.
Bing Places for Business vs. Google Business Profile
Bing Places for Business is Microsoft’s equivalent to Google Business Profile, formerly known as Google My Business. Both integrate with their respective search engines and maps platforms, helping businesses boost their organic visibility in local search results.
But there are some key differences between the two platforms.
One main difference is how you add information to a listing.
Google Business Profile relies on manual data input. As the owner, you get to decide everything that’s shown on your listing.
Bing Places for Business, on the other hand, pulls data from sources across the web, including TripAdvisor, to complement manually-uploaded information.
Another difference is how each platform collects reviews.
Google Business Profile uses a proprietary platform, while Bing Places for Business sources reviews from other sites.
Lastly, both search engines differ in popularity.
Statcounter data shows Google currently has around 92% of the total search engine market share, while Bing accounts for just around 3%.
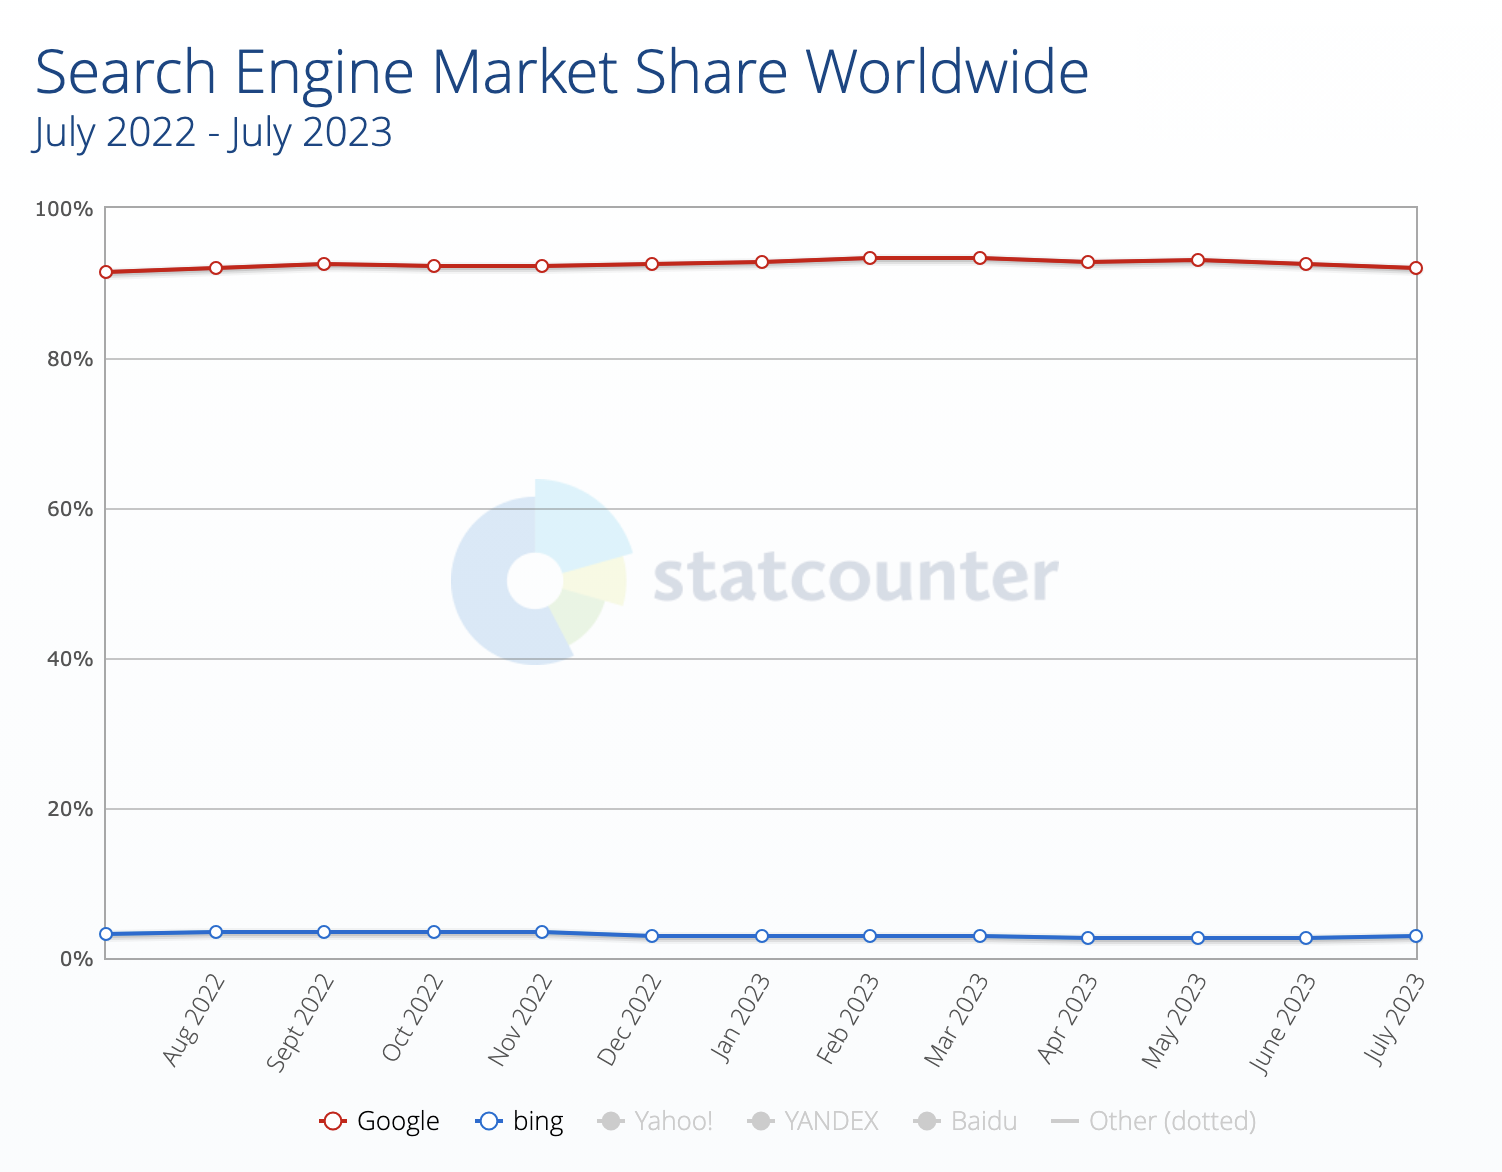
That disparity highlights why it’s important to establish a presence on both search engines.
Boost Your Online Visibility With a Business Listing on Bing
Bing Places for Business is a great opportunity to boost your company’s online profile on the world’s second-largest search engine.
Whether you’re a small business owner or a digital marketing manager for a national brand, listing management is an essential step in establishing your business’s online presence.
Save time and effort and increase the accuracy and effectiveness of your listings with just the right marketing tools:
- Listing Management: Manage your listings and reviews across multiple platforms through a unified, intuitive dashboard
- Keyword Magic Tool: Find keywords relevant to your brand and get ahead of your competitors
And read up on our Local SEO guide to learn how you can optimize your online presence even further.
By following the guide above and using Semrush to optimize your listing for the right keywords, you’ll be more visible in all the right searches in no time.
Source link : Semrush.com


